Currently when you use Mirasys VMS Main Server and not use that as recorder server. This cause that when you open System Manager you got error that Storage disk is not installed. If you have extra disk (at least 70GB) on system you can assign this to VMS Main Server. There is other way to make virtual disk which only use 2MB and show as 70GB disk to VMS Main Server.
This method is useful when you example not have extra disk or you are installing VMS Main Server to virtual machine.
You can’t use this virtual disk to store recordings if you not have enough physical disk space.
Creating virtual disk
-
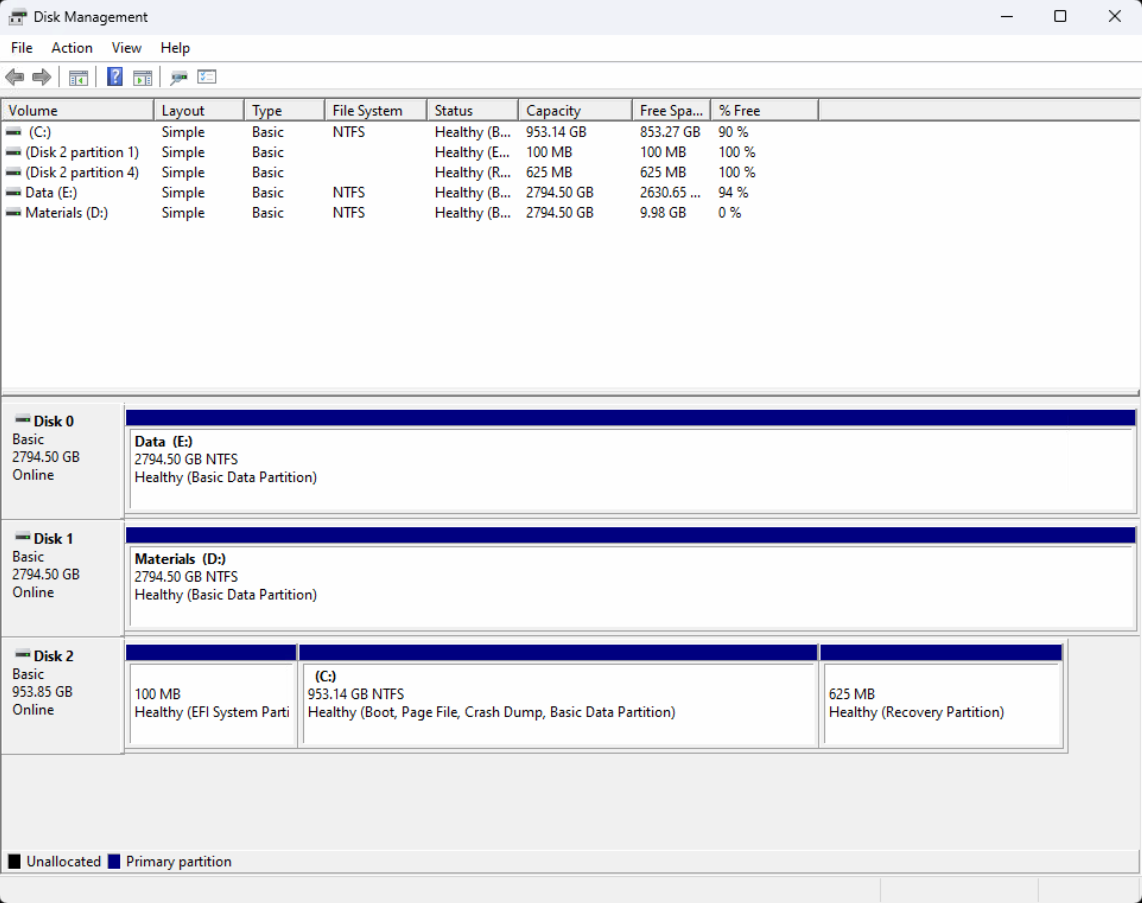
Open Windows Disk Management
-
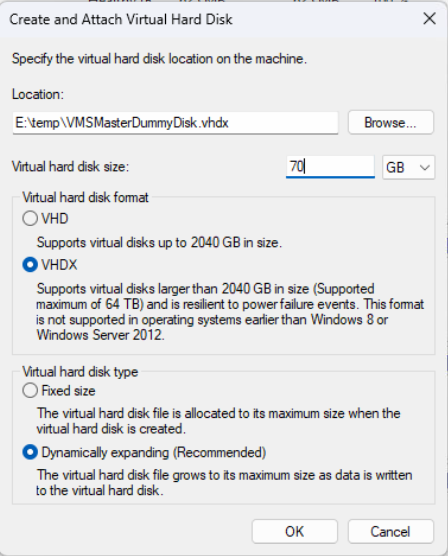
Click Action → Create VHD
-
Give location for this virtual disk and name.
-
Example location C:\temp
-
Disk name VMSMain ServerDummyDisk
-
-
Change virtual disk size to 70GB.
-
Change virtual disk format to VHDX
-
Check that virtual disk type is Dynamically expanding.
-
This option make only 2MB big virtual disk and not use full 70GB.
-
-
Click OK to create virtual disk.
-
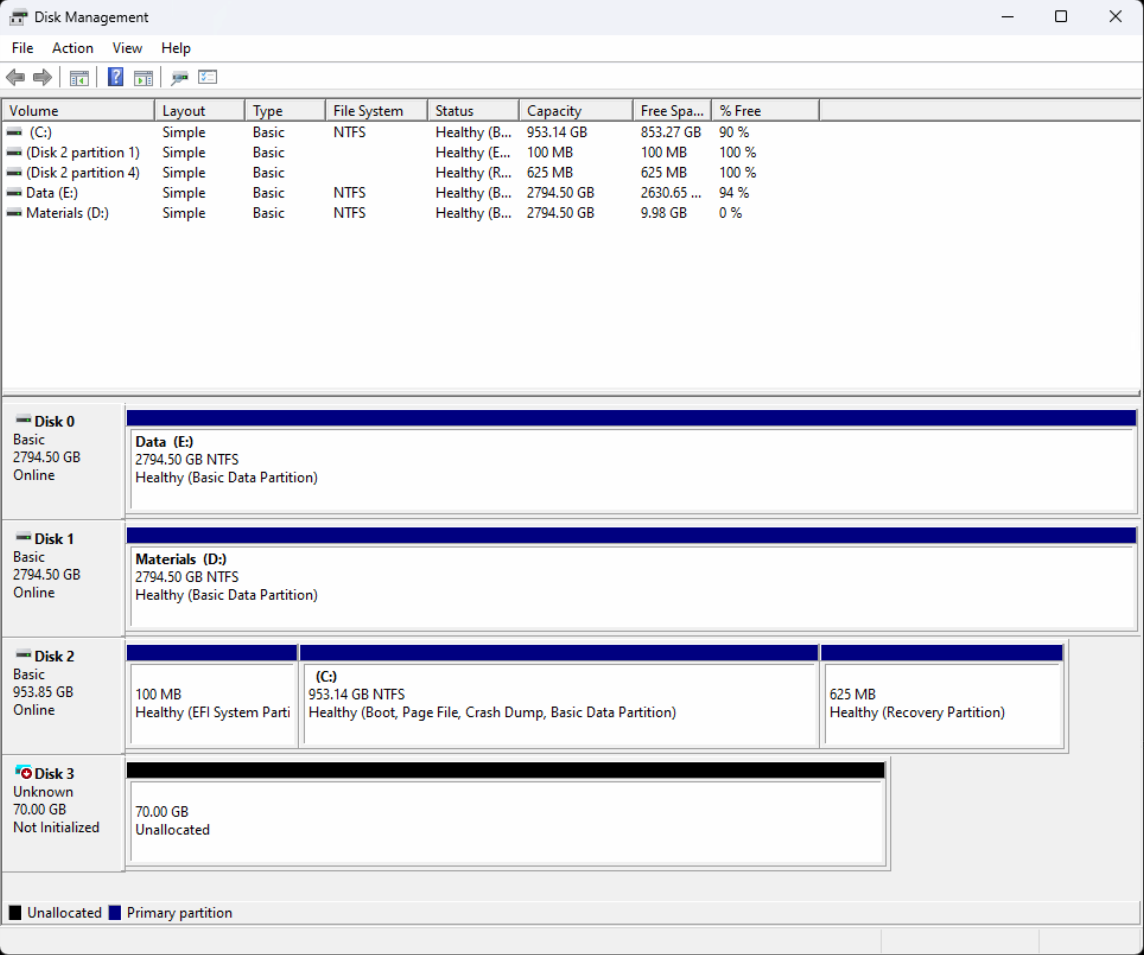
Now you see new disk in Disk Management.
-
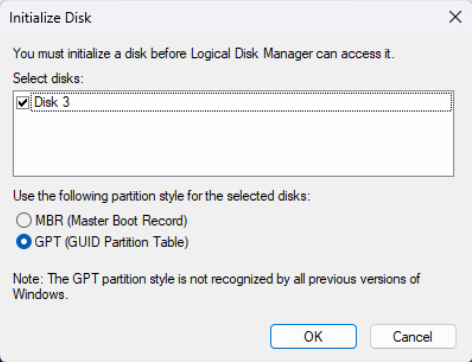
Right click Disk number and select Initialize Disk.
-
Select GPT type and click OK.
-
Now right click this disk empty area and select New Simple Volume.
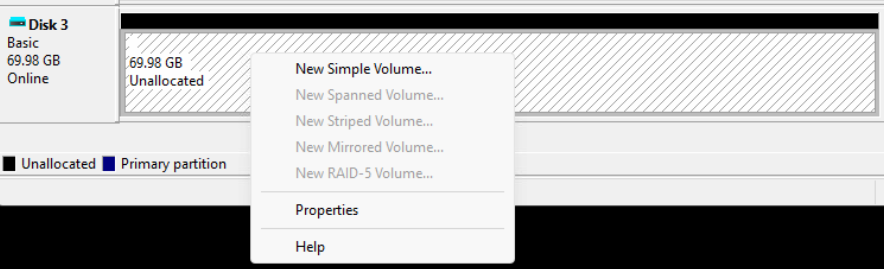
-
Format this whole disk for next free letter, or you can change letter if you want.
-
Use NTFS file type and rename this volume label same as created virtual disk name.
-
Example VMSMain ServerDummyDisk
-
-
When this is done you can see that disk is added This PC / Computer.

-
When this is done you need configure Windows to Auto-Mount this virtual disk to system when Windows is rebooted.
Configuring Auto-Mount VHDX file
-
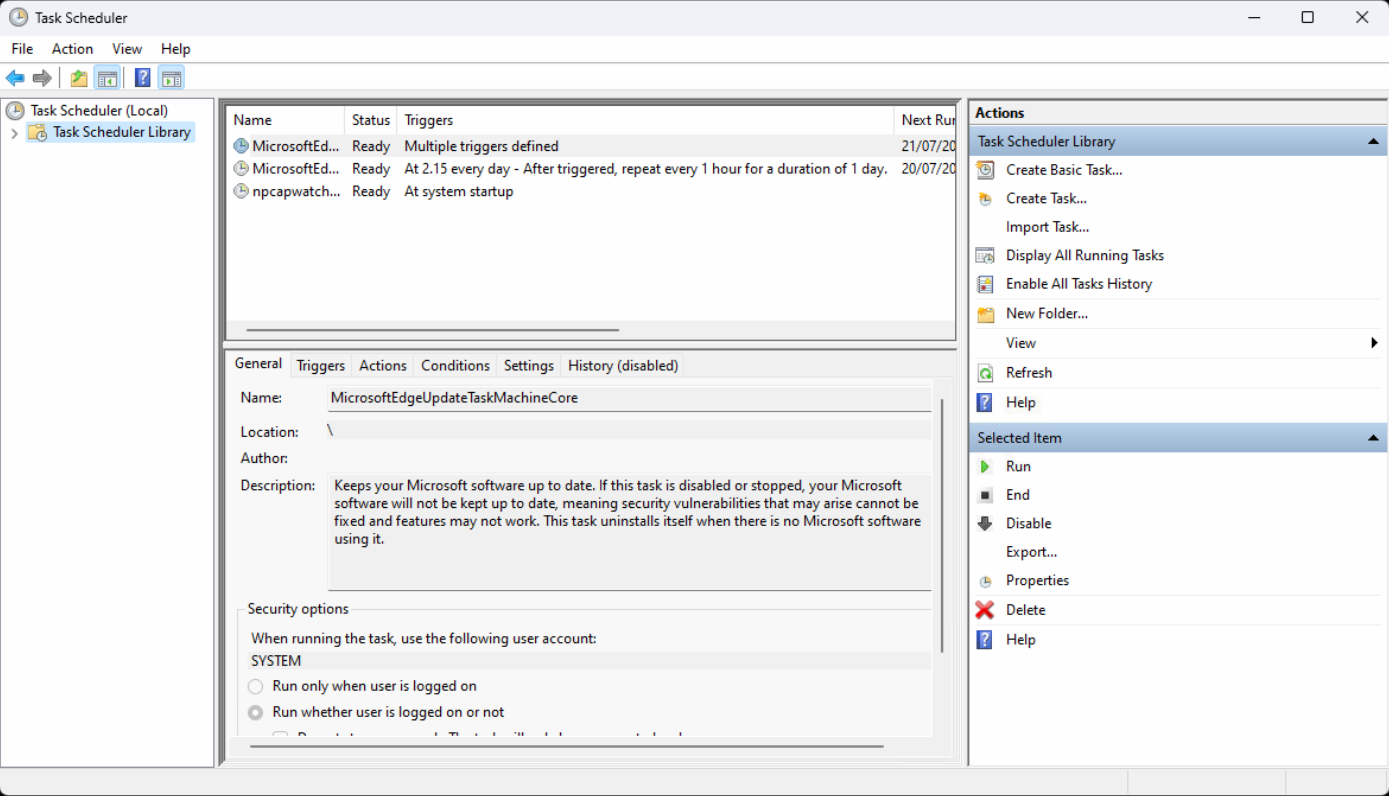
Open Windows Task Scheduler
-
Select Task Scheduler Library
-
Click Create Task
-
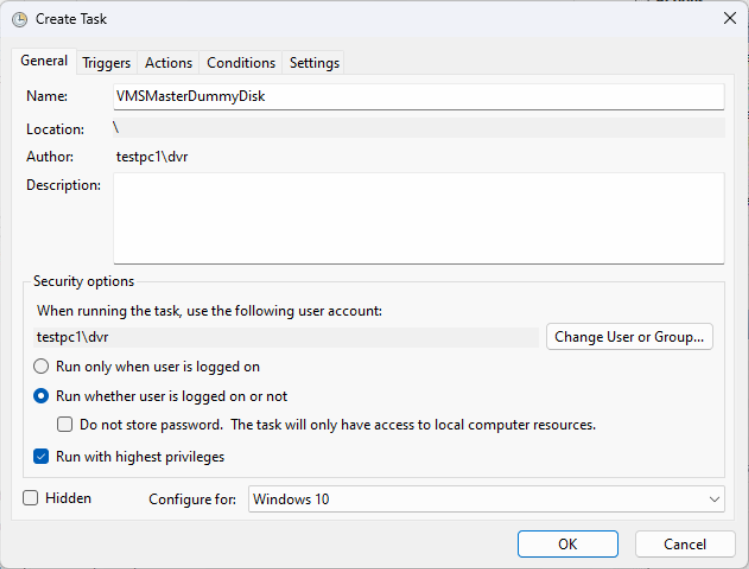
Name this task example Auto-Mount VMSMain ServerDummyDisk.
-
Give description example location of this virtual disk C:\temp\VMSMain ServerDummyDisk.vhdx.
-
Change type to Run whether user is logged on or not.
-
Enable Run with highest privileges.
-
You can change Configure for to that Windows which you are using example Windows 10.
-
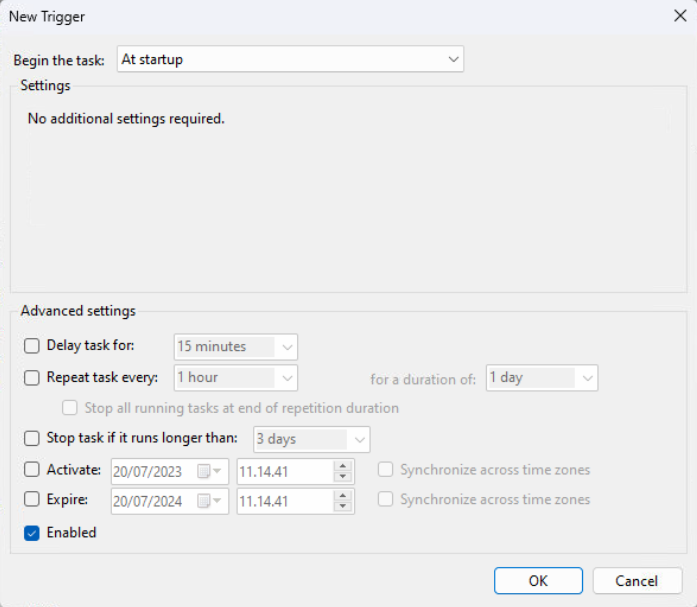
Change Tab to Triggers and click New.
-
Change this trigger Begin the task At startup and click OK.
-
Change tab to Actions and click New.
-
Check that Action is Start a program.
-
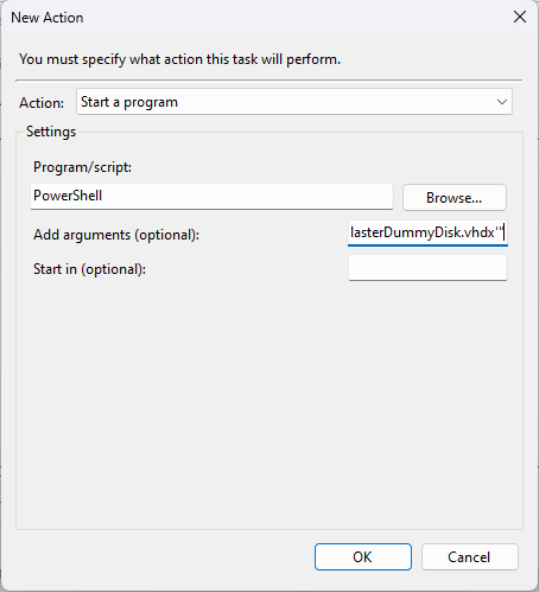
Type to Program/Script field PowerShell
-
Add arguments command to mount this dummy disk.
-
"Mount-DiskImage -ImagePath 'Full path of VHD or VHDX file'"
-
"Mount-DiskImage -ImagePath 'E:\temp\VMSMain ServerDummyDisk.vhdx'"
-
-
Click OK
-
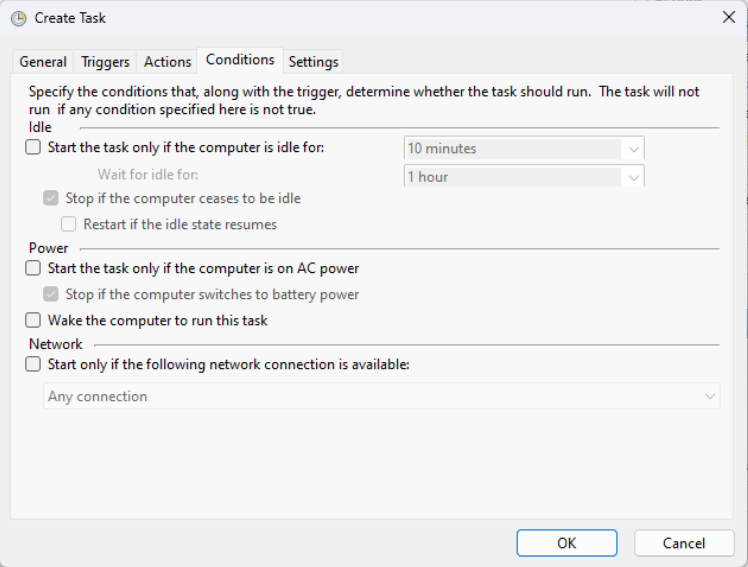
Change tab to Conditions and untick Start the task only if the computer is on AC power and click OK.
-
After this you get new window where is asked this username password. Type this username password and click ok.
-
Now there is created task which auto-mount this virtual disk on Windows when that is rebooted etc.
-
Now you can test this task.
-
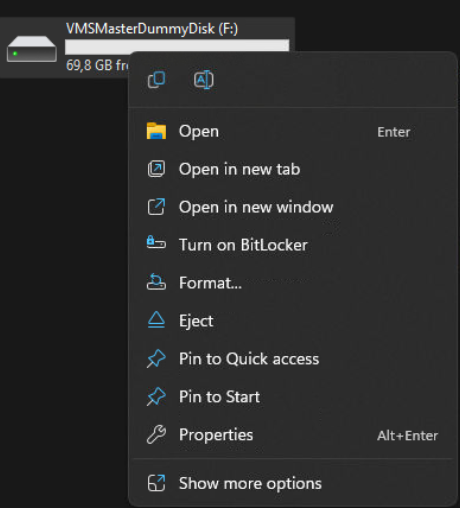
Go to This PC / Computer and right click this disk and select Eject. This selection remove this disk from system.
-
Now go to Task Scheduler and click under Selected Item Run.

-
This run PowerShell command and Auto-Mount disk to Windows.
-
If this is working correctly you should see this disk again under This PC / Computer.
-
If not then recheck made task and arguments.
-
-
Other way to test this is restart Windows and check that disk is showing correctly under This PC / Computer.
-
-
Now you can add this dummy disk to VMS Main Server using System Manager - Storage page.
Disable / Enable Auto-Mount Task
There is option Disable or Enable this task under Selected Item if that is needed.
Deleting Task
If there is need to delete this task you can do that via Task Scheduler.
-
Select this wanted task.
-
Click under Selected Item Delete.
-
Confirm deletion on new windows clicking Yes.