How to generate HTTPS certificate
HTTPS encryption requires creating access certificate. For this we can use Bosch Configuration Manager that can be downloaded on Bosch Download Area.
For generate CA certificate it’s needed to go through following steps:
-
Creating the Certificate Authority (CA) in Configuration Manager (CM).
It’s needed to go in CM select Configuration Manager tab on the left side as in the picture below @Preferences, select -> Security Tab. Now we need to create a CA using the MicroCA from CM.
Select Create -> a pop-up window will appear, select Certificate store type - USB File.
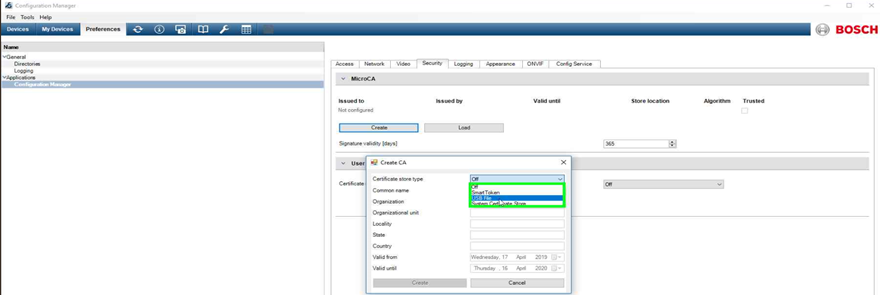
The tabs in the pop-up need to be fill in accordingly to your organization or as per customer requirements:
-
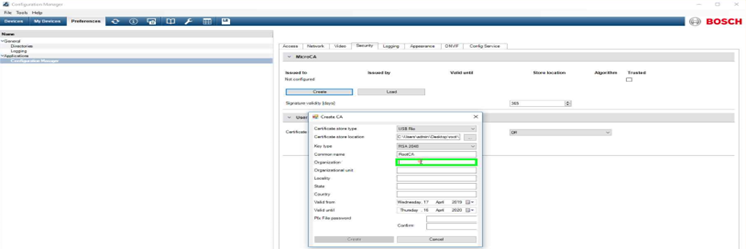
Certificate store location can be a folder on your PC or a USB Flash drive inserted in your PC. (Ex: We have created 1 folder called Root and named the file RootCA).
-
Key type - we have selected the – RSA 2048.
-
Pfx File Password – Insert a strong password.
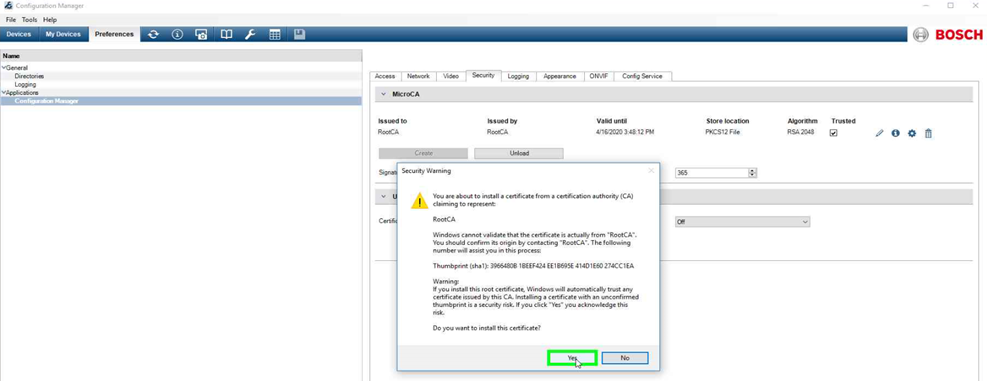
Select the Create button, confirm the new CA and then “check” the box underneath the Trusted option from the same page.
Another pop up will appear requesting you to confirm the creation of a new CA, select Yes -> done.
-
-
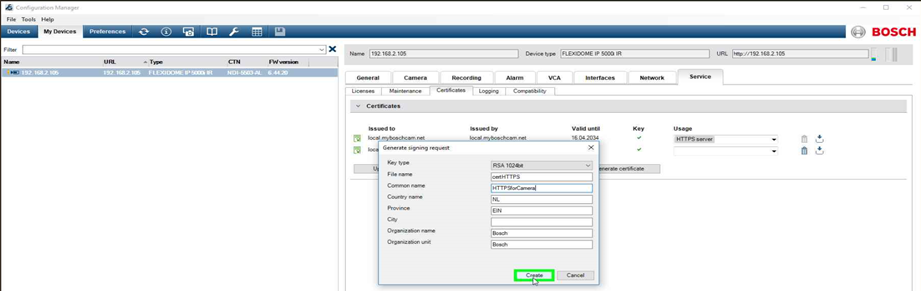
Creating the HTTPS certificate for the camera
In Configuration Manager @Service tab of the Camera, select subtab Certificates, and click on the Generate signing request
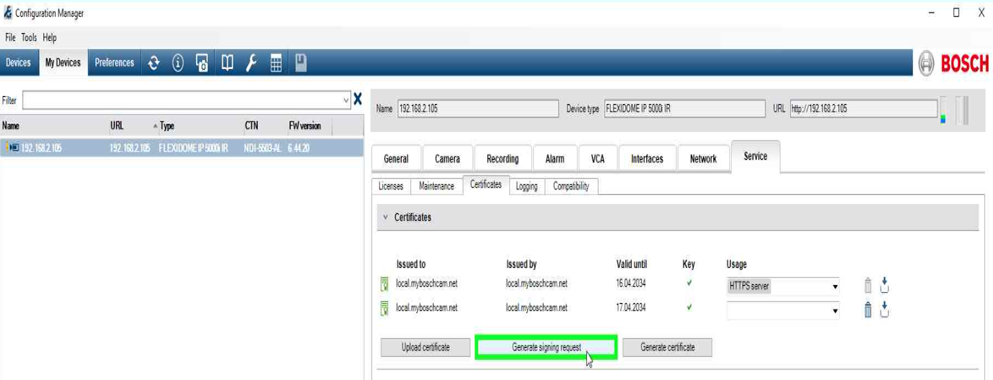
-> A pop-up window will appear, the tabs need to be fill in accordingly to your organization or as per customer requirements:
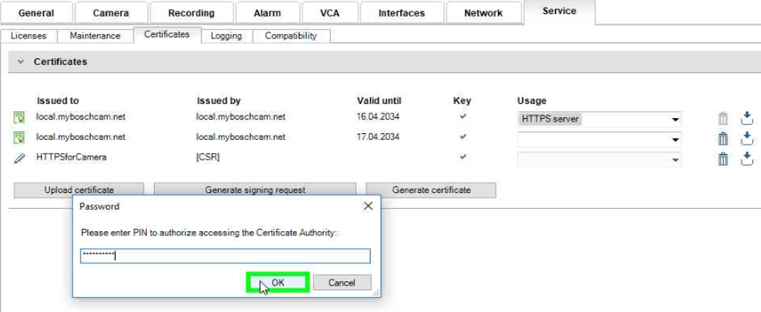
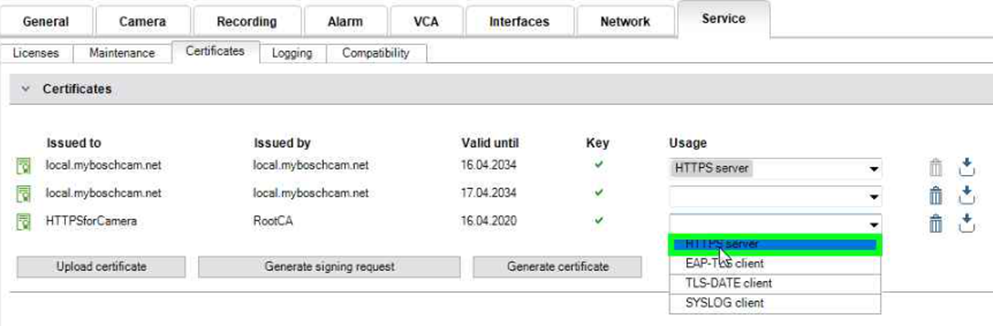
Confirmation of the certificate is made after selecting the crayon icon next to the Certificate created.
A Save & Reset for the camera will follow allocating a Usage from the list next to that certificate.
-
Creating the Camera_Access_Certificate
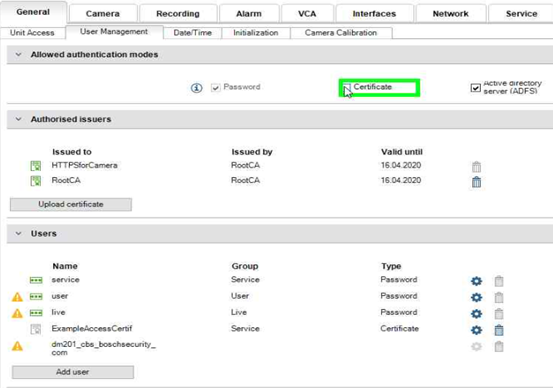
For this, you need to select the camera in CM, select the General tab, then the User Management tab and click the Add User button in the Users row.
->a pop-up window will appear, the tabs need to be fill in accordingly to your organization or as per customer requirements:

After filling all the tabs, you need to Save, camera restart will fallow.
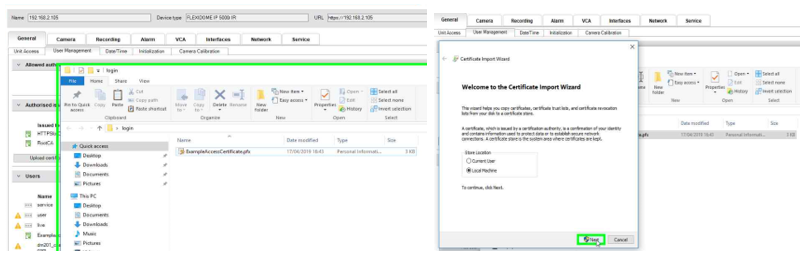
A certificate file will be created with the extension .pfx.
->@ General tab, then the User Management, you will find the Allowed authentication modes check the box Certificate, a Save & Reset for the camera will follow.
-
This will allow you to access the camera using the certificate.
-
If you want to remove the password authentication, then just uncheck the Password box -> @General tab, then the User Management, you will find the Allowed authentication modes
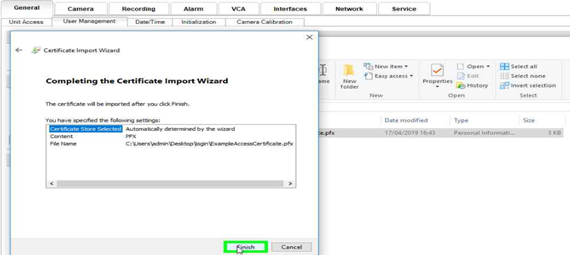
To access the camera from a different PC you need to copy the .pfx certificate file created go to the new PC/workstation and install the certificate. Test -> access should be ok.
-