AXIS devices
This guide explains how to configure and enable HTTPS communication on Axis devices from AXIS Device Manager.
How to generate certificates
First it’s needed to open AXIS Device Manager, select Configuration tab and go to Security > Certificates.
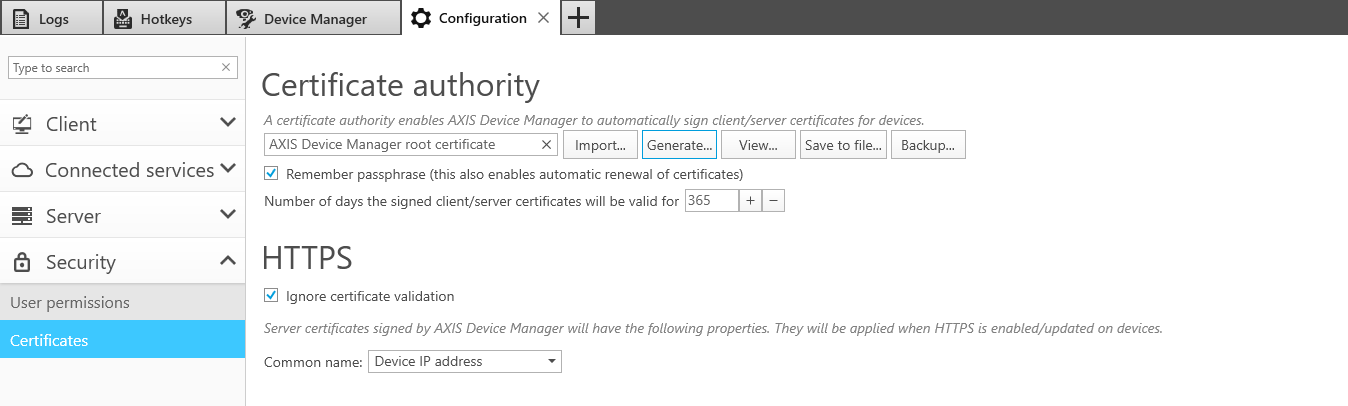
There are two options how to use AXIS Device Manager:
Using AXIS Device Manager as Certificate Authority.
Using AXIS Device Manager as CA simplifies the whole process of deploying and renewing certificates for the administrator. It means AXIS Device Manager will use its own root certificate to issue server certificates and there is no other root CA involved in the process.It’s needed to click Generate… and enter a Passphrase. For increased security, it is recommended not to select “Remember passphrase”.

Once generated, click Save to file… and save ADM_root_certificate.crt on your computer.
This certificate can be provided to any third-party application in order to trust the device
certificate.Using AXIS Device Manager as Intermediate Certificate Authority.
Using AXIS Device Manager as Intermediate CA implies that you have an existing CA (root or
intermediate CA) which can issue CA certificates to other intermediate CAs (e.g. AXIS Device
Manager). In this scenario you need to import a CA certificate in AXIS Device Manager in order
to sign and issue server certificates for the Axis devices. This CA certificate may be a root
certificate or a subordinate CA certificate (intermediate certificate).
It’s needed to click Import… and select your existing CA certificate. For increased security, it is recommended not to select “Remember passphrase”.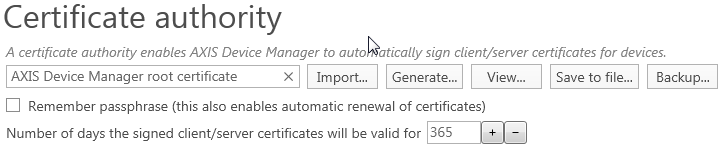
Choose Common name for server certificate.
Select the Common name from Device IP address or Device host name (FQDN).
This setting specifies what device specific property will be written as the common name in the
individual certificates that are created for each device when AXIS Device Manager acts as a
Certificate Authority.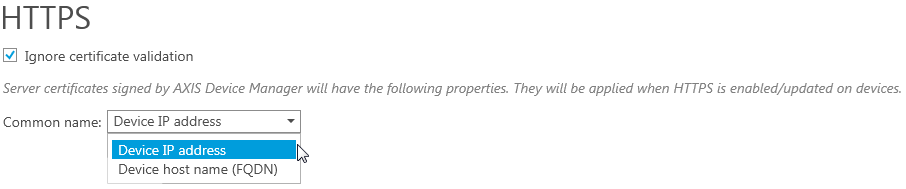
In the Device Manager tab, the HTTPS column should change from Disabled (Missing server
certificate) to Disabled for supported devices.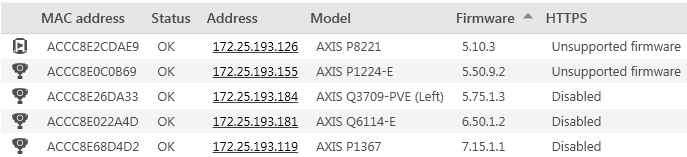
Enable HTTPS on the devices.
To enable HTTPS on the device(s), right-click on the selected device(s) and go to Security >
HTTPS > Enable/Update.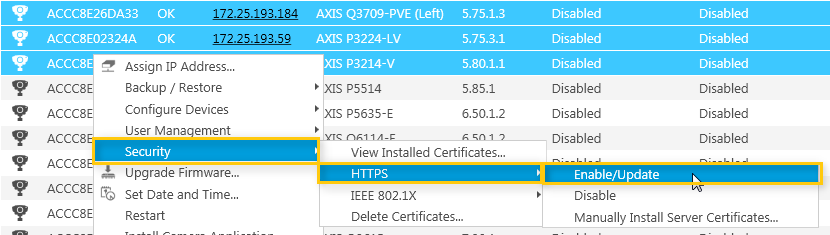
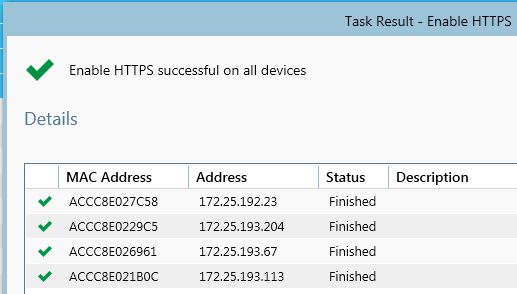
The HTTPS column should change to Enabled for the selected device(s). You are done!

Double-click on the task to check the result for each device.
Note: Since AXIS Device Manager is set to “Ignore certificate validation” by default, it is necessary to disable this option after HTTPS has been enabled in order to get an exclusive HTTPS connection to the device from the software. This can be done from the Configuration tab under Security.
How to install self-signed certificate on device
To install a self-signed certificate on the Axis device, follow these steps:
Log into the Axis camera and go to "Setup" → "System Options."
Find the "Security" → "HTTPS" tab and click on it.
Click on "Create Self-signed Certificate" and a new window will pop up.
Fill out the form in the pop-up window and then click "OK." There is now a new self-signed certificate installed on the Axis device.
On the Mirasys VMS side add the camera normal way.