ith this integration you can receive tampering events from Vivotek IP-camera to Mirasys VMS.
Because Vivotek camera is not sending any identification, there is need to make own text channel per camera. But there can be used same UDD file for these channels.
Requirements
-
Latest Mirasys VMS
-
UniversalDataDriver feature in license
-
Included in default V9 Enterprise license
-
-
Vivotek camera where is configured data sending to wanted IP-address and port
VMS Text Channel Configuration
Text Channel configuration need to be done that server where camera is located.
-
Copy UDD4VivotekCamera.xml file to DVR-folder
-
Default installation location C:\Program Files\DVMS\DVR
-
File can be found bottom of this guide.
-
-
Open System Manager and logon there using Administrator user rights
-
Go to Serves tab and open Text Channels
-
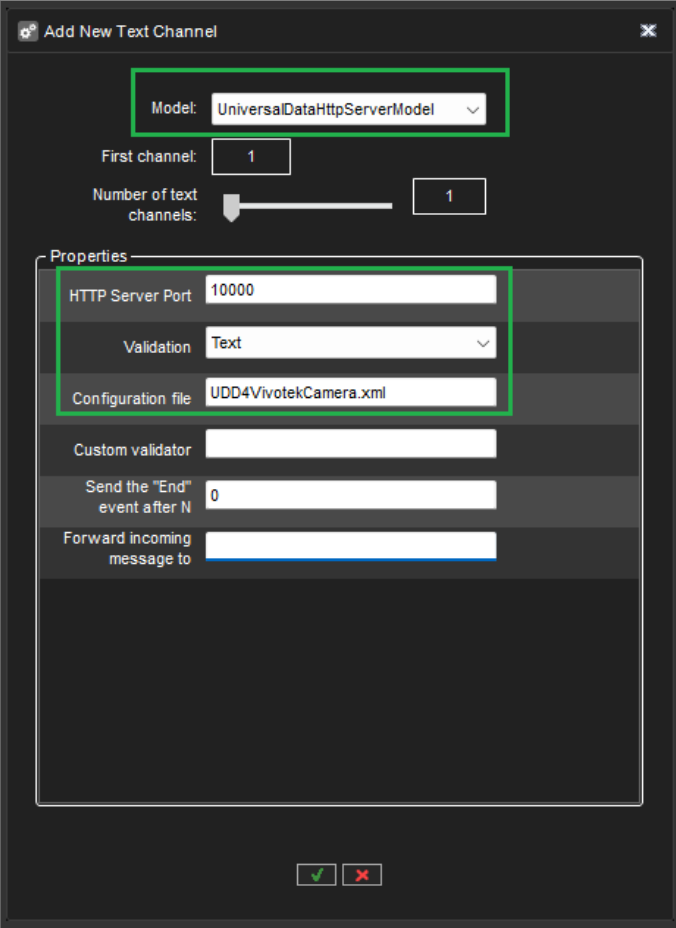
Make there new Text Channel
-
Model; UniversalDataHTTPServerModel
-
HTTP Server Port; 10000 or next free one
-
Validation; Text
-
Configuration file; UDD4VivotekCamera.xml
-
Custom validator; Empty
-
Send the “End” event after N; 0
-
Forward incoming message to; empty
-
-
Now you can save these settings.
Firewall Configuration
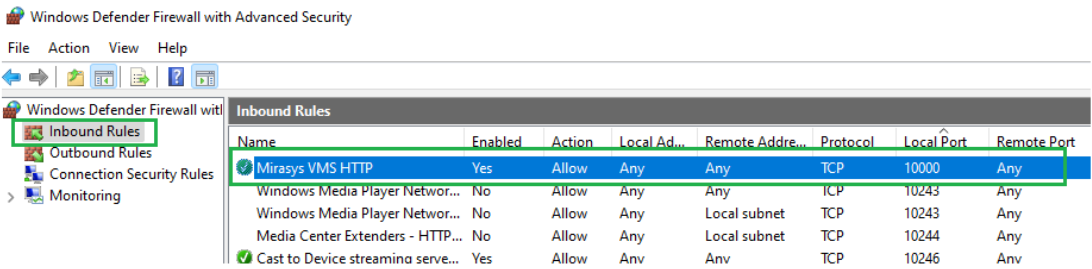
Depending Windows side configuration, you may need to open port in Windows firewall.
-
Open firewall settings and create new rule to allow incoming connection to your TCP port which you specified in text channel settings.
-
For example, if you specified port 10000, then you need to add inbound rule in firewall settings like shown in the picture below:
-
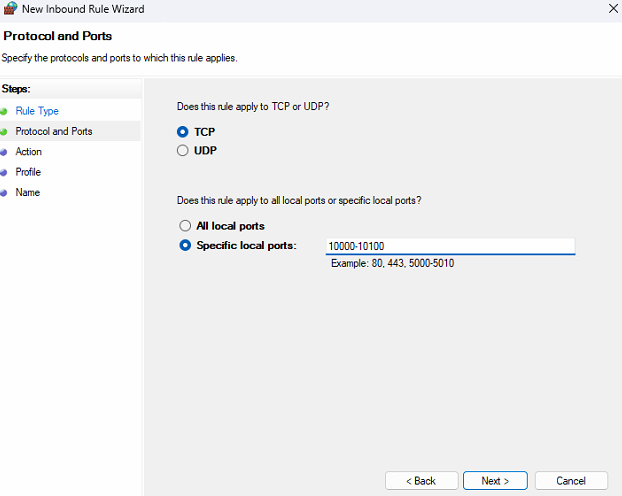
If there is need to open multiple ports at same time to same server, you can add multiple ports to firewall Inbound Rule.
Vivotek camera configuration
-
Open camera web interface
-
Go to Configuration
-
Click Applications
-
Then click Tampering detection
-
Enable and configure tampering detection.
-
Example is show in the picture below.

-
-
Click Save to store settings.
-
After this go to Configuration.
-
Click Event
-
Then click Event settings
-
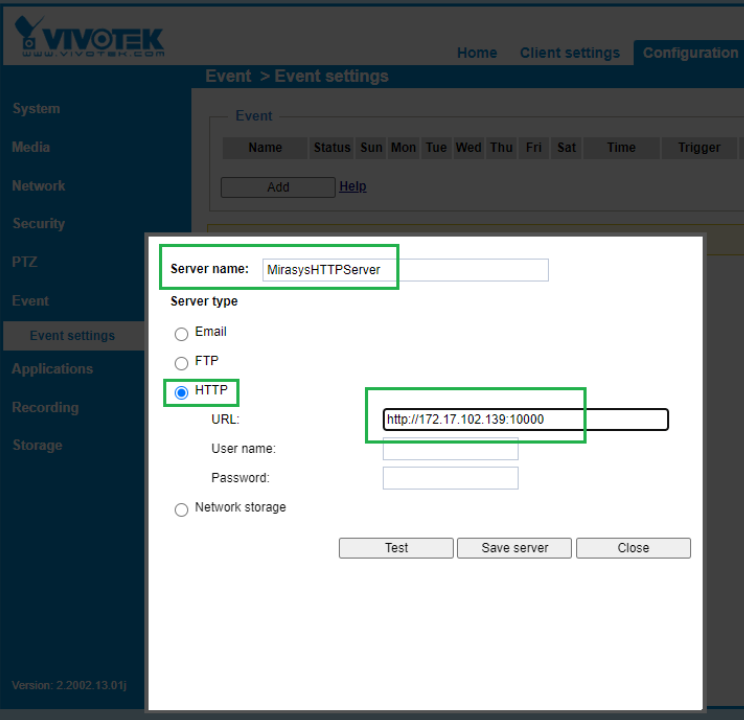
On this Click Event Server
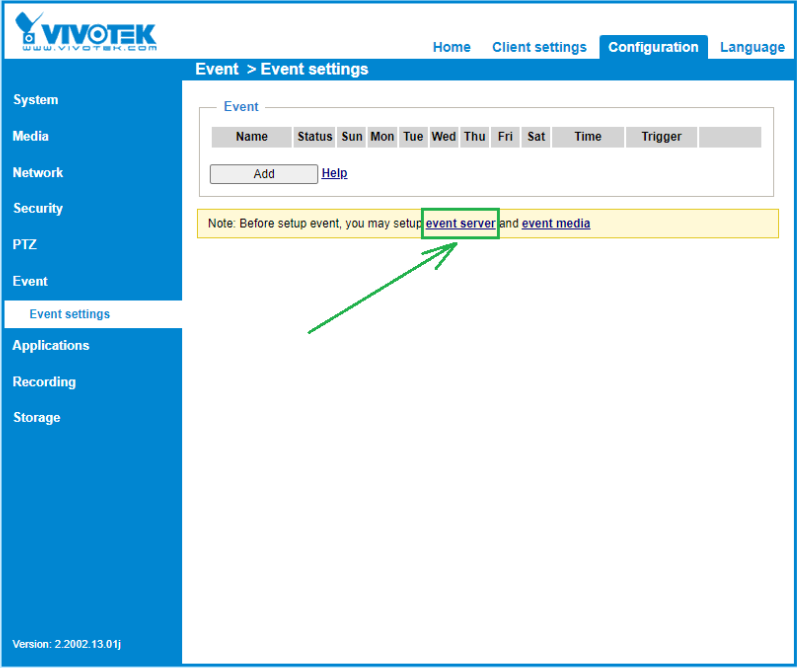
-
This open new window where you can fill VMS server details
-
Server name: any name
-
Server type: HTTP
-
Where <IP_address> the address of recorder where you configured text channel and <port> is the port that you specified in text channel settings.
-
-
-
Then click Save server button to save settings and after that Close button.
-
This create event server in camera settings where camera will send event data.

-
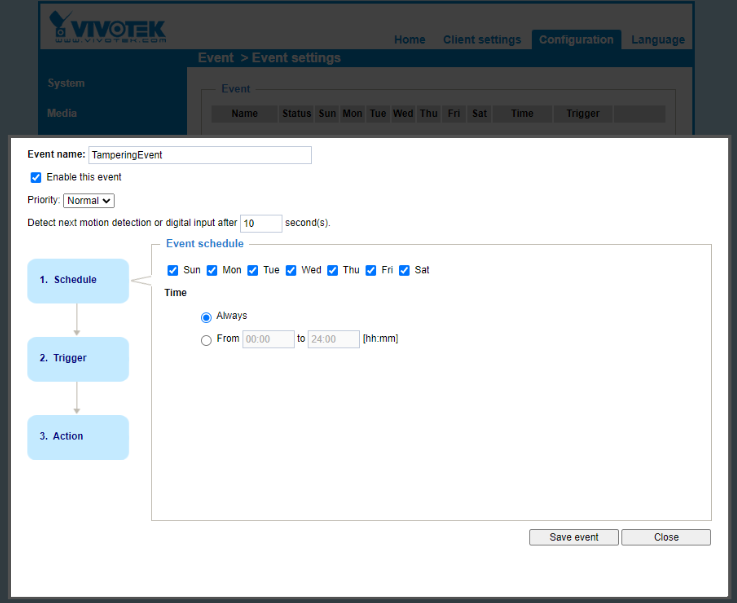
Click Add button under Event section to make a new event.
-
Put here any event name, enable the event and configure “Schedule”, “Trigger” and “Action” like shown in the pictures below.
-
For the schedule you should select all days and “Always” time.
-
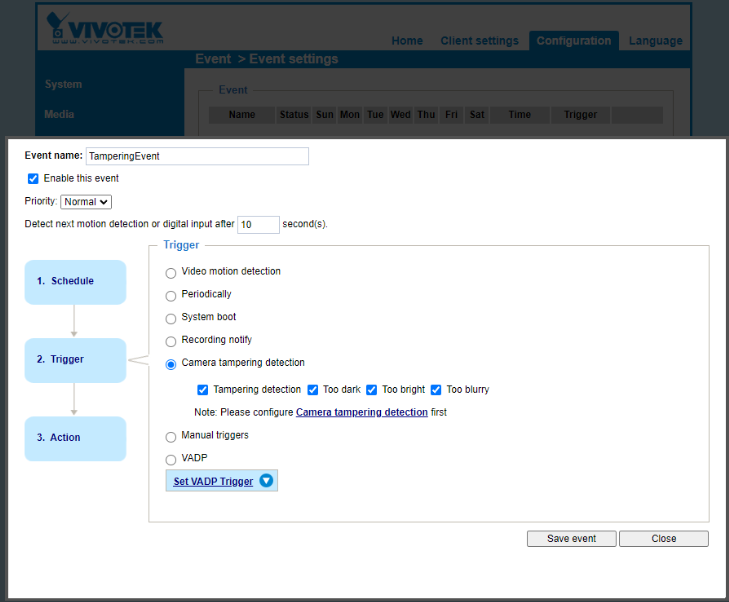
For the trigger you should select “Camera tampering detection”.
-
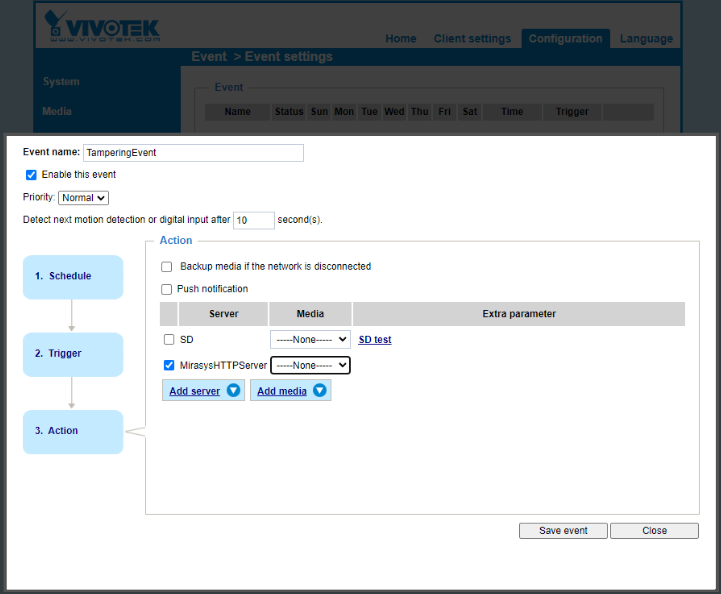
For the action you should select configured HTTP server.
-
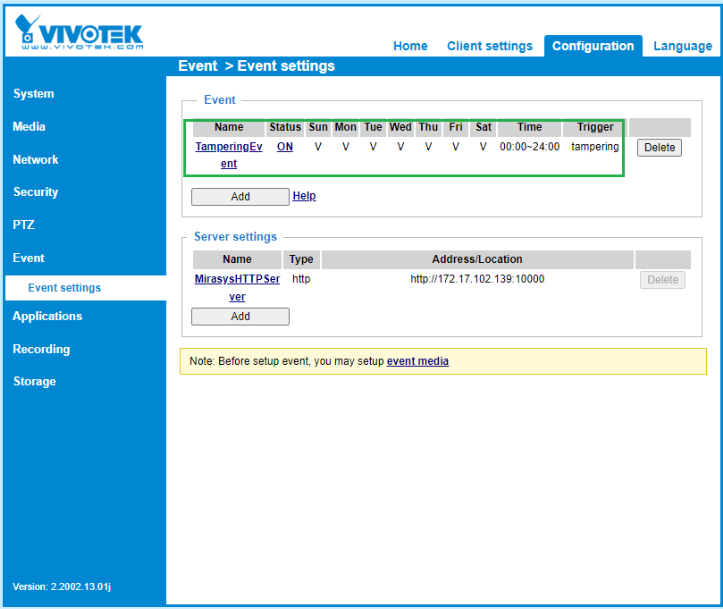
After saving event and closing event configuring dialog you will see configured event in the list.
Alarm configuration
If there is need to generate alarm when this event happens, this can be done via System Manager.
-
Open System Manager
-
Go to second tab where servers are listed
-
Select server where Vivotek camera channel is configured
-
Double click Alarms
-
This open new window where you can do alarm configuration.
-
-
Create new alarm clicking New Alarm icon
-
General tab name this alarm
-
Example camera name + Tampering
-
Select wanted alarm options
-
-
Trigger tab
-
Select this configured Text Channel and wanted event.
-
Example Camera tampering detection
-
-
-
Actions tab
-
Select wanted action for this alarm
-
Example tampered camera video recording
-
-
-
Calendar tab
-
On default alarm is always on.
-
On this tab you can change when alarm is active or not.
-
-
UDD4VivotekCamera.xml
Troubleshooting
-
No data in Text Channel
-
Check configuration and test that camera is working as normal on VMS side.
-