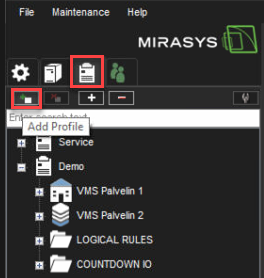
To add a profile:
-
Click Add Profile
-
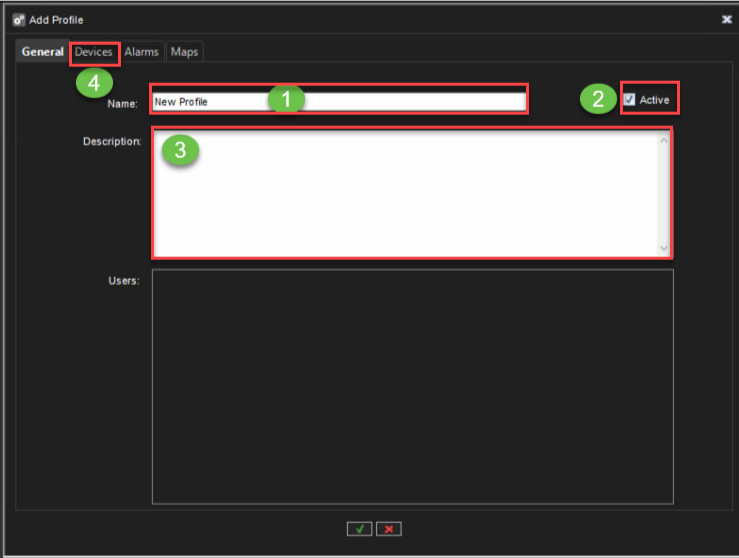
Set the name of the profile
-
Set profile status: Active or Disabled
-
Set description, if needed. The description is shown only in System Manager
-
Open Devices
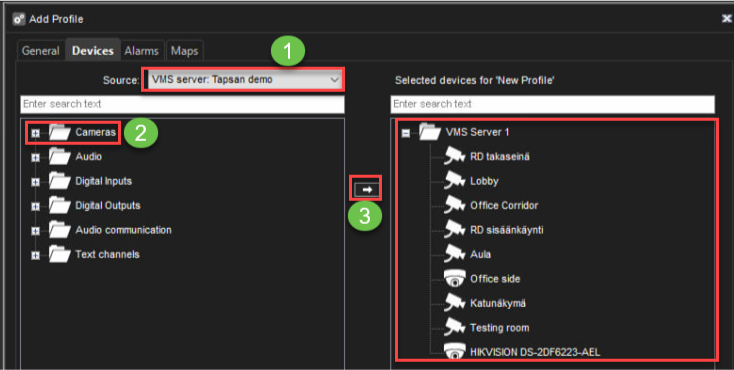
Devices
-
From the Source drop-down list select VMS server or another profile
-
Select needed components or device groups from the left box
-
Click Add
-
To change selected components properties, please go to Selected Devices
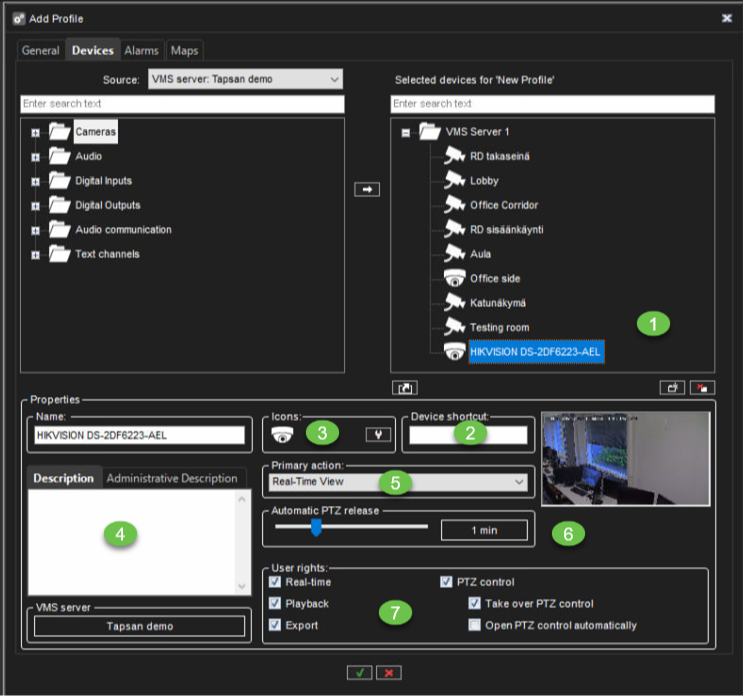
Selected Device Properties
-
Select component from the list of the selected device
-
Set Device shortcut
-
Change the device icon by clicking Change Icon
-
Set Description and Administrative Description, if needed
-
Select the Primary action, select the action that will occur when a user double-clicks the device in Spotter.
-
Set Automatic PTZ release(only for the PTZ cameras)
-
Set user rights for the component
-
Real-time
-
Playback
-
Export
-
PTZ Control(only for the PTZ cameras)
-
Take over PTZ control
-
Open PTZ control automatically
-
-
-
Click OK to finalize the profile creation
PTZ control
-
Automatic dome release
-
Values: 10s, 20s, 30s, 40s, 50s 1 min, 2 min, 3 min, 4 min, 5 min, 10 min, 20 min, 30 min
-
-
Take over PTZ control
-
No warning popup
-
-
Open PTZ control automatically
Sort selected device nodes
Alphanumeric sorting ( a -> z) of selected folder profile nodes is executed when pressing sort button, second press will execute reverse sorting (z -> a,).
Text channel Device Window Options
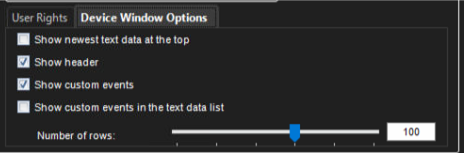
In Device Window Options, you can select how text data is shown to users. These options are available:
Show the newest text data at the top.
By default, the newest text data is added to the bottom of the text data list. Select this option to show the newest text data at the top of the text data list instead.
Show header
Select to show identification data specified by the text data capture driver.
Show custom events
Select to show custom events specified by the text data capture driver.
Show custom events in the text data list
Select to show custom events in the text data list (instead of the custom event list).
The number of rows
Specify the number of rows that are shown in the text data list at the most.
Adding Device Groups to the list of the selected device
-
Click Add Device Group below the Selected devices panel. A new device group is shown.
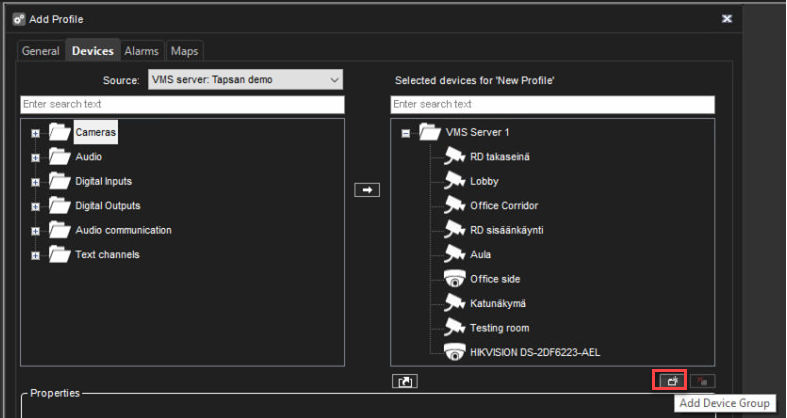
Note: A new device group is always added under the selected device group. To add a device group to the top level, make sure that none of the existing device groups is selected.
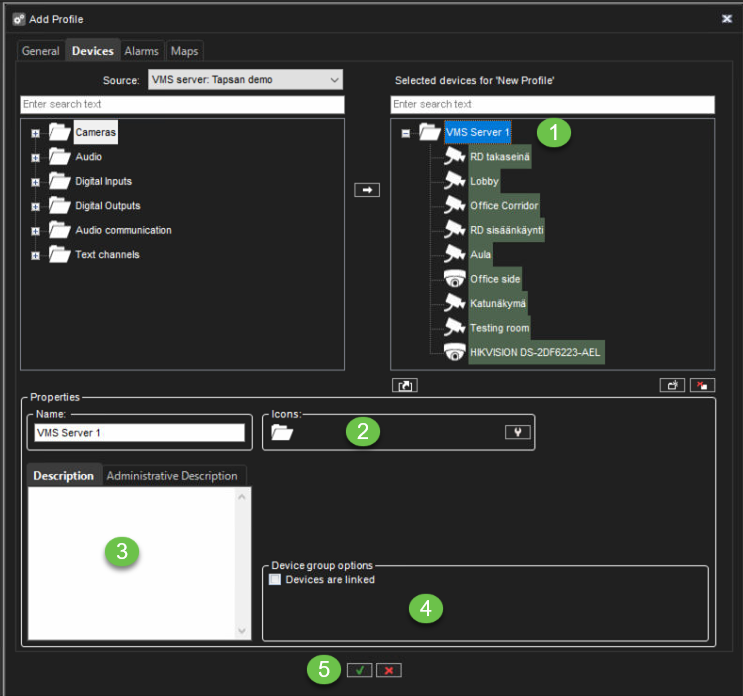
-
Click the device group and type a name for it
-
To change the icon that is used for the device group, click Change Icon. Then select the icon that you want to use.
-
Type a description of the device group in Description.
-
Set Device group options, if needed(Devices are linked to automatically open all device views from the same group when the user opens one of the device views).
Sort Alphabetically
Sorting rules:
-
to the folder or root level where the currently selected component is located (but not to subfolders)
-
to the selected folders (but nor to subfolders)
-
if no profile node is selected, root nodes are sorted (but nor subfolders)
-
if multiple folders are selected from same level, all selected folders are sorted (but not subfolders)
Alarms
Editing Profile Specific Alarm Settings

On the Alarms tab, you can select the alarms you want to include in a profile and edit the alarms’ profile-specific user rights.
To add alarms to a profile:
-
Open the Alarms tab.
-
Select a server from the Source drop-down menu. The available alarms are shown in the left pane.
-
Select the alarm or alarms that you want to add and then click the right arrow. You can also drag alarms from the left pane to the right.
-
Save the profile by clicking OK.
Note: You can also add alarms to profiles through the alarm creation/editing screen.
To edit profile-specific alarm user rights:
-
Open the Alarms tab.
-
Click on an alarm in the Selected alarms pane.
-
Set the user rights for each alarm. The user rights settings are located on the bottom right side of the Alarms tab.
-
You can set individual rights for each alarm or select multiple alarms (by holding the shift or control keys down while selecting alarms) and set the same options for multiple alarms.
-
-
To have the computer play a sound when an alarm occurs, select Alarm sound and then select the played sound. To test the sounds, select the sound from the list and click Play.
-
Save the settings by clicking OK.
The user rights include:
-
Real-time video and audio. Select to let the users see real-time alarm video or audio.
-
Pop-up video. Select to let users receive alarm video automatically.
-
Pop-up audio. Select to let users receive alarm audio automatically.
-
Playback. Select to let the user's playback alarm video.
-
Export. Select to let the users save alarm video on local media.
-
Acknowledge. Select to let the users acknowledge alarms.
Maps
Adding Maps to Profiles
To add a map:
-
Click the Change Level button and then select the device group to which you want to attach a map. The devices that belong to the selected group are shown in the left pane.
-
Subgroups are also shown. You can also double-click the subgroup icons in the left pane to move to a lower level.
-
-
Click Add Map and find the image that you want to use as a map.
-
Select the devices and device groups you want to add to the map from the left pane and click the Add to Map arrow.
-
Items that are already on the map appear dimmed in the left pane. If you add subgroup icons to the map, the icons will act as links to the subgroup maps.
-
Users can move to a lower level map by double-clicking the subgroup icon.
-
Tip: To select more than one device simultaneously, keep the SHIFT or CTRL key pressed.
-
Select a device or device group from the map, and then, under Device properties, you can set these options:
-
For cameras, you can select the direction that the camera icon points to.
-
By default, the name label of each device is shown on the map. To avoid label clutter, clear the check box Label. The name will be shown as a popup label instead.
-
If you need to fit several device icons in a small space, you can use placemarks.
-
Select the Placemark check box. A placemark (x) and a connecting line are shown on the map. Drag the placemark (x) to the device’s correct position.
-
Then drag the icon to a convenient position on the map.
To remove a site map:
-
Display the map that you want to remove and click Remove Map
To remove an icon from the map:
-
Select the icon and click Remove
Supported map image files are
-
.jpeg
-
.jpg
-
.png
-
.bmp