Add devices to a profile
-
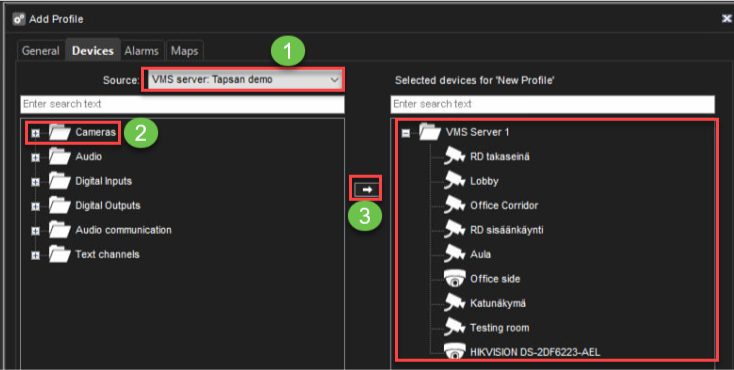
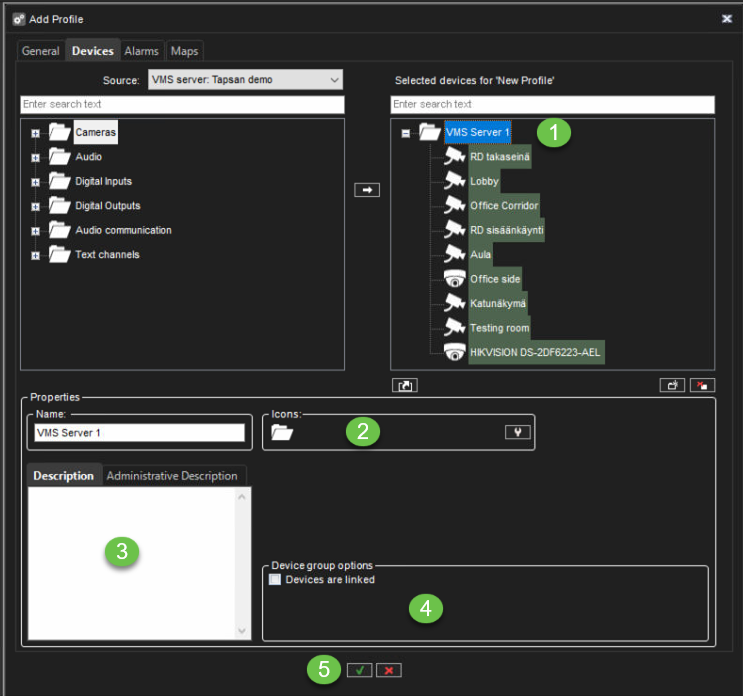
From the Source drop-down list select VMS server or another profile
-
Select needed components or device groups from the left box
-
Click Add
-
To change selected components properties, please go to Selected Devices
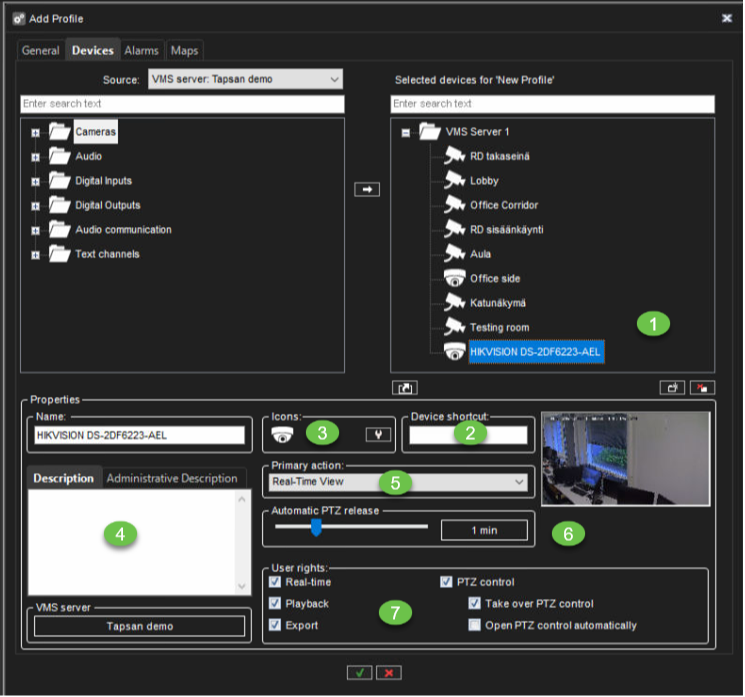
Selected Device Properties
-
Select component from the list of the selected device
-
Set Device shortcut
-
Change the device icon by clicking Change Icon
-
Set Description and Administrative Description, if needed
-
Select the Primary action, select the action that will occur when a user double-clicks the device in Spotter.
-
Set Automatic PTZ release(only for the PTZ cameras)
-
Set user rights for the component
-
Real-time
-
Playback
-
Export
-
PTZ Control(only for the PTZ cameras)
-
Take over PTZ control
-
Open PTZ control automatically
-
-
-
Click OK to finalize the profile creation
Sort selected device nodes
Alphanumeric sorting ( a -> z) of selected folder profile nodes is executed when pressing sort button, second press will execute reverse sorting (z -> a,).

PTZ camera profile settings
In System Manager camera profile settings in PTZ camera user rights, selection Open when selected is added.
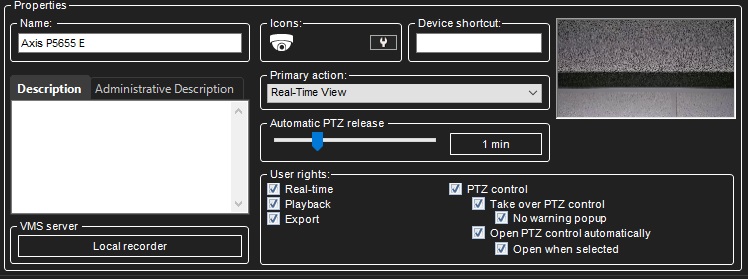
If Open when selected is selected, then PTZ camera control is automatically activated when PTZ camera view is selected in Spotter.
PTZ control
-
Automatic dome release
-
Values: 10s, 20s, 30s, 40s, 50s 1 min, 2 min, 3 min, 4 min, 5 min, 10 min, 20 min, 30 min
-
-
Take over PTZ control
-
No warning popup
-
-
Open PTZ control automatically
Text channel Device Window Options

In Device Window Options, you can select how text data is shown to users. These options are available:
Show the newest text data at the top.
By default, the newest text data is added to the bottom of the text data list. Select this option to show the newest text data at the top of the text data list instead.
Show header
Select to show identification data specified by the text data capture driver.
Show custom events
Select to show custom events specified by the text data capture driver.
Show custom events in the text data list
Select to show custom events in the text data list (instead of the custom event list).
The number of rows
Specify the number of rows that are shown in the text data list at the most.
Adding Device Groups to the list of the selected device
-
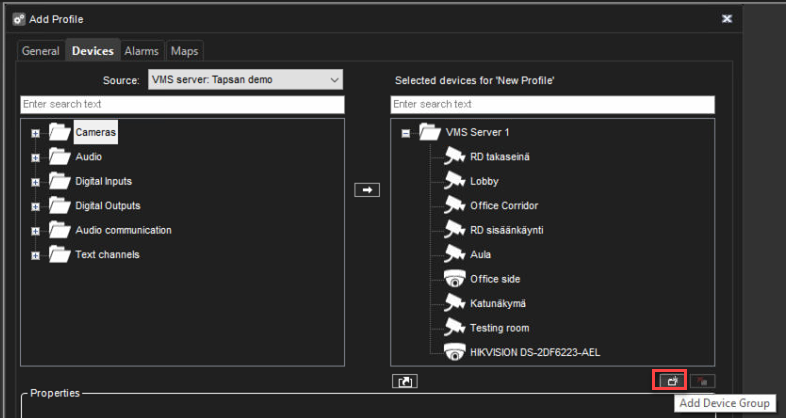
Click Add Device Group below the Selected devices panel. A new device group is shown.
-
Click the device group and type a name for it
-
To change the icon that is used for the device group, click Change Icon. Then select the icon that you want to use.
-
Type a description of the device group in Description.
-
Set Device group options, if needed(Devices are linked to automatically open all device views from the same group when the user opens one of the device views).
Sort Alphabetically
Sorting rules:
-
to the folder or root level where the currently selected component is located (but not to subfolders)
-
to the selected folders (but nor to subfolders)
-
if no profile node is selected, root nodes are sorted (but nor subfolders)
-
if multiple folders are selected from same level, all selected folders are sorted (but not subfolders)
Client Plugins
Web browser plugin
The web browser is configured in System Manager > Profiles > Select and open Profile > Devices.
-
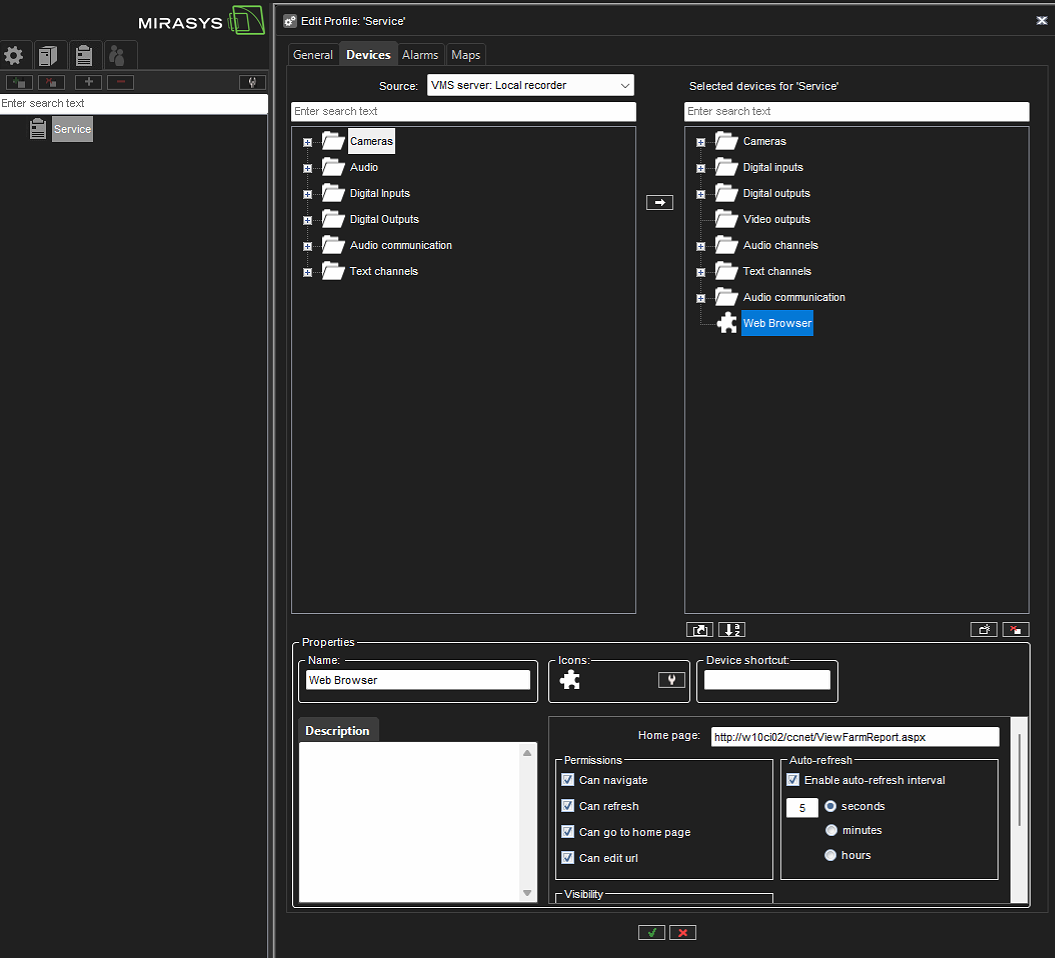
To add webpages as channels, change the source to Client Plugins. Select the Web Browser plugin, and add it to Devices.
-
Select the Web Browser, and add the name, a description if you want one, and change the icon if you want to.
-
Under Home page, add the web page address.
-
Set permissions:
-
Can navigate
-
Can refresh
-
Can go to home page
-
Can edit URL
-
-
You can select to enable an Auto-refresh interval, and set the interval in either seconds, minutes, or hours.
-
Click ✓ to Save.
VLC Player plugin
VLC Player configuration is done in System Manager > Profiles > Select and open Profile > Devices.
To configure the VLC Player plugin:
-
Click the Devices tab in Profile settings.
-
Select Client plugins from the Service drop-down menu.
-
Select VLC Player.
-
Click the arrow ➡️ pointing to the right to add the VLC Player to the profile tree.
-
Name the Player instance under Properties.
-
Add a Description if needed.
-
Select an icon for the Player under Icons if needed.
-
Add a Device shortcut if needed.
-
Enter the VLC Player URL that you want to play.
-
Tick the box Show URL if you want the URL displayed in Spotter.
-
Tick the box Auto-play if you want VLC Player to play the URL when opened in Spotter.
-
Click ✓ to Save.
