Alarm Export
Alarms are exported by dragging the alarm from the alarm list or the alarm view to the export area.
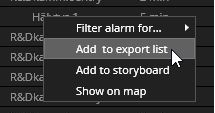
The alarm list also has an option in the single alarms right-click menu to add an alarm to the export area.
Alarm export contains pre-event and post-event recording times
Immediate Alarm Export to a specified folder
When system administrators enable and configure this feature, it is possible to directly export an alarm to a specific folder in Alarm Search from the Alarms table in Spotter. This feature can be used for a specific purpose, such as exporting false positives for AI model training.
Immediate Alarm Export settings
Click File in the top menu and select Settings.
Click the Alarm export tab in Settings. This tab is hidden if you do not have the user role for it, which is enabled by your System Administrator in the System Manager application.
Tick the box Enable alarm export.
Select the location to which you want to make the export.
Name the folder.
Select if you want to copy Spotter player.
Select exporting format.
Select Encode quality.
Check the boxes to select the following options:
Protect clip with password
Mark privacy zones on client
Blur faces
Mask moving objects
Add bookmarks
Click Save to save settings.
How to use Immediate Alarm Export

Click Alarm in the top menu, and then click Alarm search. In the Alarm search result table, the Immediate Export column is visible when alarm export is enabled in the settings above.
To make an immediate alarm export, click the folder icon in the Immediate Export column.
When the export is made, the folder icon changes to the text Exported to folder so you can easily keep track of which alarms have been exported.