With this guide you can activate encoder, change IP Address and add it to Mirasys VMS.
Activation
-
Encoder default IP address is 192.0.0.64
-
Login that IP address using web browser
-
This will open Activation page, where you need but password for admin user
-
Confirm password and proceed forward
-
Next system will ask security questions, select wanted question and type there your own answer
-
After filling needed information click OK and proceed forward
-
Now encoder is activated and ready to use
Activation can be also done using iVMS-4200 software. You can download software here.
IP Address change
-
Login to encoder using web browser
-
Go to Configuration → Network → Basic Settings → TCP/IP
-
Untick DHCP selection and type there your wanted IP Address, Subnet Mask and Gateway
-
You can also change DNS Server address if this is needed
-
-
And last click Save
-
Now system reboot and start using new IP Address
VMS Configuration
-
Open System Manager
-
Go to VMS Servers
-
Double click Hardware
-
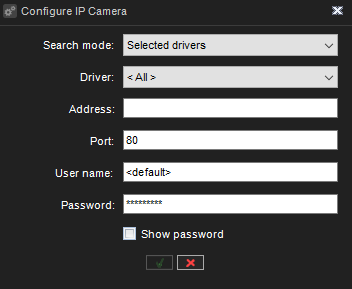
This open new window where you can add encoder to system, click Add IP Camera
-
Type this new window encoder IP Address, User name and Password
-
-
After this click OK and wait
-
When system detect encoder you will see new window where you can select how many channel you want to use (max 16 channel)
-
Select wanted amount of channels and then click OK
-
Lastly click OK for Hardware
-
Now encoder is added Mirasys VMS