-
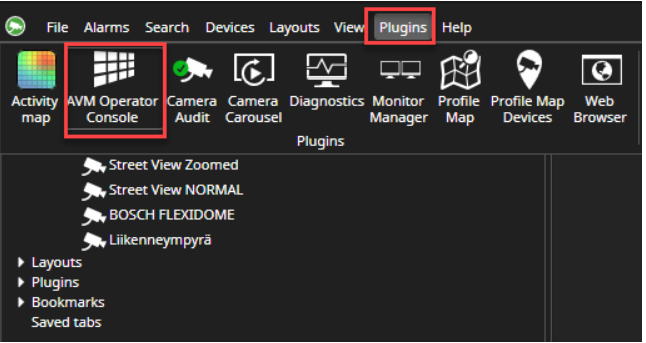
Go to the Plugins
-
Open AVM Operator Console
-
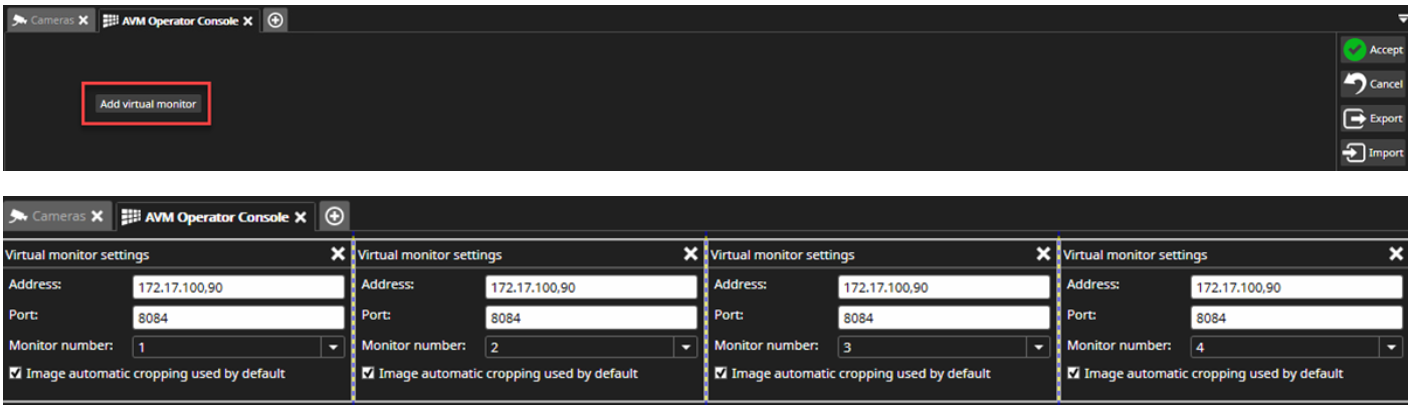
Click Add virtual monitor
-
Set IP address of the AVM DS to the address field
-
Add the correct amount of the virtual monitor to each AVM DS
-
Repeat the same actions to each AVM DS
The AVM Operator Console can be opened from the plugin menu.
The IP address or computer name of the AVM Display Servers are added to the settings with the “Add virtual monitor” button.
Typically, this task is done at the system configuration stage and does not need to be done many times.

The setting view can be accessed by the user who has system administration privileges.

After the monitor configuration is saved, the first layout containing the AVM monitors can be created It is recommended to create a layout with no content on the monitors and save it as a shared layout. The Operator Console represents the matrix’ monitors content and has most of the standard Spotter functionality.
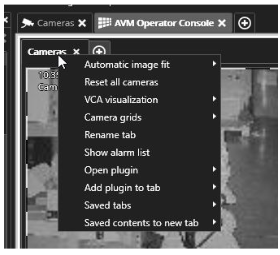
In the tab menu:
-
Creating, closing, reordering, renaming, moving and copying tabs is possible.
-
Control of auto-crop and VCA highlight for the whole tab is possible (from the tab menu).
-
Control of Spotter fixed camera grids is possible.
-
Show/hide the alarm list is possible.
-
Opening any plugin is possible.
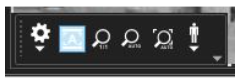
In the toolbar menu (for individual cameras):
-
Control of image display settings, ThruCast settings and camera name and timestamp settings.
-
Control of individual auto crop settings.
-
Control of automatic virtual zoom settings.
The selected AVM monitor in the Operator Console is shown with a solid white line.

The same line is visible in the AVM matrix monitors when the AVM operator console monitor representation is clicked with the mouse.
Operators can use this effect to direct the attention of other guards to a specific monitor in the matrix.
The selected camera inside the Operator Console is highlighted with a dotted white-grey border.
The Activity panel is not shown when the AVM console is used. The playback time can be controlled with playback and date and time controls.
Adding, Moving And Copying Cameras In AVM
It is possible to move and copy cameras and tabs from the Operator Console to standard, local Spotter and back. Similarly, it is possible to move and copy cameras and tabs from one AVM monitor to another.
The playback time will synchronize when content is moved or copied.
Moving happens simply by dragging and dropping the content to another location.
Copying happens by keeping the Ctrl key pressed when dragging a tab or a camera.
This feature can be used for fast copying of content from AVM monitors to local Spotter monitors, such as using the time slider and seeking some exciting event.
Then when the exciting event has been found in the local Spotter, the camera(s) with the playback position can be moved or copied back to a new AVM monitor tab to be shared with everyone in the room watching the AVM monitors.
Cameras are added to the Operator Console monitor in the same way as to standard Spotter.
The user first selects the console monitor, and then cameras can be added to it by double-clicking the mouse, drag and drop, device numbering and numeric keypad, or navigating to the correct device in the device tree and hitting the enter key.
Camera images in the Operator Console are not live camera images; they are reference images, so they are static.
Using Numeric Keypad For Camera And Monitor Selection In AVM
When an Operator Console is selected, the keyboard numeric keypad monitor selection applies to it, not local Spotter windows or PC monitors.
So, writing “3” and “plus” selects the third AVM monitor and not the third local monitor.
To select the third local monitor, the user has to move the AVM Operator Console away from the foreground.
PTZ control via the Operator Console is also possible using the joystick. Control with a mouse or keyboard is not possible.
It might be easier to control PTZ cameras via local Spotter and have the camera visible on the wall monitor simultaneously.
Camera Tours In AVM
Camera tours work in the same way as standard Spotter camera tours.
The user can select the AVM monitor from the Operator Console and then choose the camera tour settings for this monitor.
Pressing the camera tour “Start/Pause camera tour” button will start the tour.
The camera outline will change to orange to indicate the running tour.
The only difference to a standard camera tour is that the check box controls if the camera tour runs on a standard screen or full-screen is not visible.
Layouts In AVM
All the monitor settings, tabs, tab names, tab order, and cameras on the tabs and playback time and camera tour settings are stored to layouts also when the AVM Operator Console is open.
This is an easy way to update the entire AVM wall monitor content.
Combined with layout scheduling, updating AVM walls or individual monitors in a building automatically is possible.
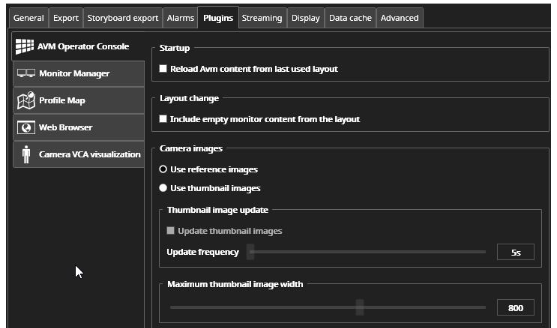
The AVM Operator Console plugin has two settings that can be used to change how the system behaves when:
-
I am starting Spotter and connecting to the AVM Display Servers and the wall monitors.
-
A layout is loaded.
The default setting for startup behaviour is that when an Operator Console connects to the AVM Display Servers, it shows the current content of the wall rather than replacing the content of the wall with the last used layout.
This setting should be the most common.
If the users want to change this setting, they can check the box “Reload AVM content from last used layout”.
When the checkbox is selected and the user opens Spotter, Spotter will open the same active view when the user logged out from Spotter last.
If the AVM Operator Console were open with different content at that time, with this setting, the Operator Console would now change the AVM monitor content.
The other settings are related to the use of reference images or thumbnails in the console view.
The use of high-res thumbnails increases system load but will make the camera representation appear better in the console view.
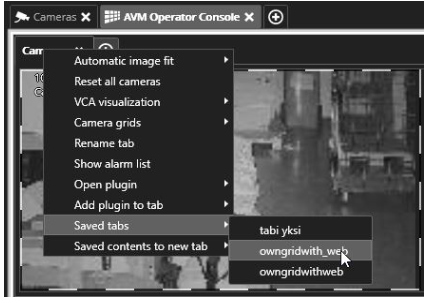
Opening Saved Tabs in AVM
Alarm popup, Web Browser, Profile maps, Camera carousel and other plugins can be used easily with AVM when these plugins are saved to a tab, the tab shared and then opened in the AVM.
This way, the Operator Console can manage multiple Alarm monitors and use Web Browser and Profile maps.
The opening of shared tab content from the tab menu.