On the Spotter client: these privacy zones are implemented only on the viewing client.
This allows the complete video to be recorded and exported, but the privacy-screened areas are only accessible for users who have the right to do so.
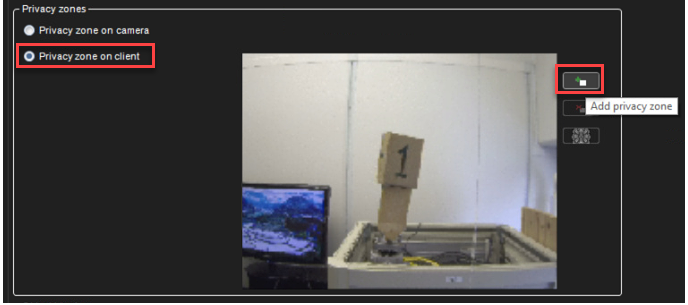
Adding privacy zone
-
In the Privacy Zones tab, select the camera from the camera list.
-
Select Privacy zone on the client
-
Click Add privacy zone.
-
Paint the privacy zone onto the camera view. The newly created zone is displayed in semi-transparent light grey. You can resize and move the zone by dragging it.
-
Repeat steps 1-3 to create as many private zones as required.
-
Click OK.
Removing the privacy zone
To remove privacy zones:
-
In the Privacy Zones tab, select the camera from the camera list.
-
Click on a privacy zone in the camera view.
-
Click Remove privacy zone or Remove all privacy zones.
-
Click OK.