The user can create a media clip with the Spotter, which contains max. 8 cameras
All devices, which are selected to Add to the video export area will be added to the media clip
-
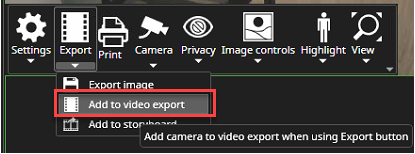
Open camera toolbar from needed camera
-
Click Export
-
Select Add to video export
-
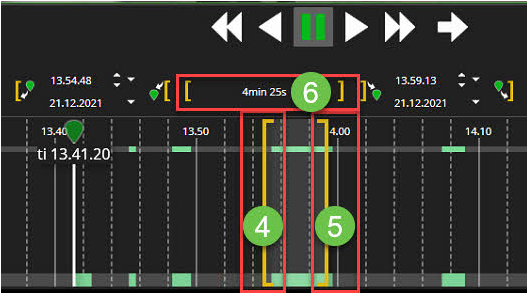
Set media clip starting point using LEFT yellow bar
-
Set media clip endpoint using RIGHT yellow bar
-
The Middle area shows the total length of the media clip
-
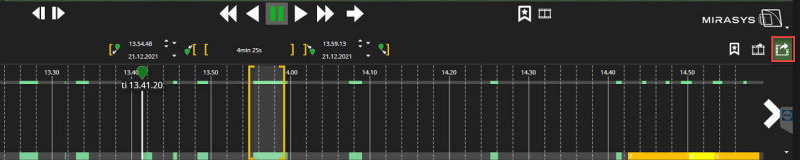
Select Start to video export
-
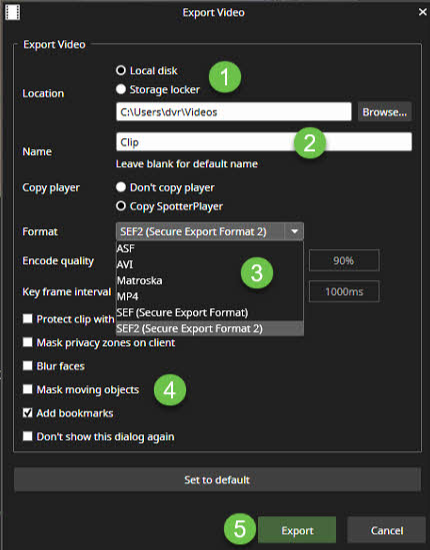
Select the location
-
Set name
-
Select Format
-
Enable all other needed options
-
Click Export
-
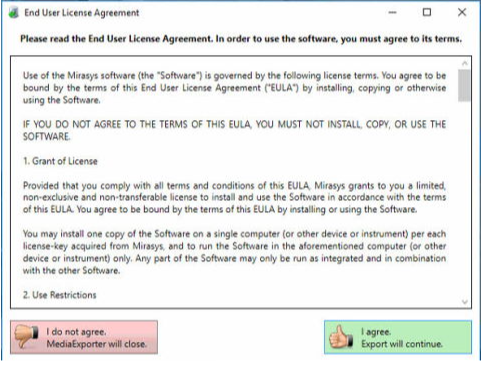
Click I agree. Export will continue
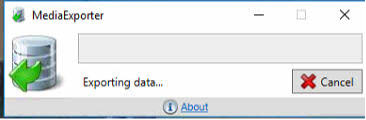
MediaExporter show exporting data process
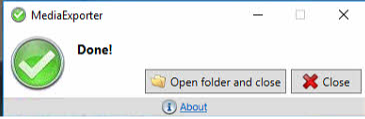
When MediaExporter has finalized the video export, the user can access the location folder by clicking Open folder and close
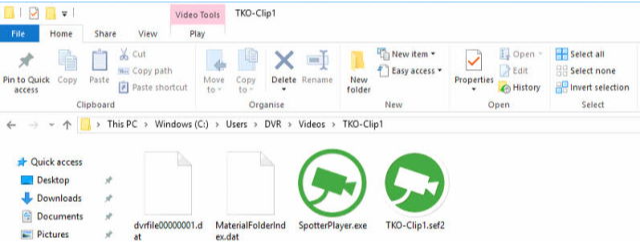
The folder contains all necessary files and SpotterPlayer.exe
Supported export formats
-
ASF
-
AVI
-
Matroska
-
MP4
-
SEF and SEF2
The fastest export file format is SEF (Secure Export Format). It can be viewed with Spotter or SpotterPlayer.
-
SEF - video with subtitles audio, text data (authenticity protected format)
-
SEF2 - video with subtitles audio, text data (authenticity protected format)
-
ASF- video with subtitles audio, text data (authenticity protected format)
-
AVI - video, audio
-
MP4 (new in version 9.x) - video with subtitles
Using the SEF2 enables:
-
Protecting the video material with the password,
-
Software side privacy zones in the export,
-
Blur faces(The blurring needs to be enabled for the camera to be included in the export.)
-
Mask moving objects(The blurring needs to be enabled for the camera to be included in the export.)