Asennuksen vaiheet
Asenna O3C-palvelin oppaassa "AXIS O3C Server Reference. ilmoitetulla tavalla Asenna O3C-palvelin oppaassa "AXIS O3C Server Reference. Ilmoitetulla tavalla AXIS One-Click Cloud Connection Server 2.30.0), part 2.2.2.
Tärkeitä asioita:
-
Install the O3C-server as described in the guide "AXIS O3C Server Reference. Windows and Linux Versions" (Technical Reference Document. AXIS One-Click Cloud Connection Server 2.30.0), part 2.2.2.
Important things:
-
setup provider certificate authority:
Directory in which the CA should be set up [default: ca]: (by default ca)
Passphrase for the CA key (DO NOT FORGET THIS!) [default: N/A]: pAs_sw! ord (some password)
Valid time, in days [default: 7300]: 100 (any number)
Issue a server certificate:
Path to the CA directory [default: ca]: (as above)
Passphrase for the CA key [default: N/A]: pAs_sw! ord (as above)
Subject Alternative Names (separated by comma) [default: N/A]: 172.17.102.56 (very important!!! Should be the equal IP address of O3C server)
Valid time, in days [default: 398]: 100 (as above)
Result:
The concatenated server certificate and key saved to: ca/issued/stserver_EA363E5578E696E7.pem
Register the O3C server as a service in Windows SCM: the Power Shell tool for Windows is needed! And for install call:
.\setup_service.ps1 add -c C:\o3c-server\o3c-server.conf
Configure o3c-server.conf
listen_client = 172.17.102.56:80
IP and port where the server will wait for the client (the camera) connections
stserverid = test_o3c_server
Any string
cert_file = C:\o3c-server\stserver_EA363E5578E696E7.pem
issued server certificate created after command: "pkitool issue-server-cert"
provider_ca = C:\o3c-server\stserver_ca.crt
CA certificate from ca directory created after the command: "pkitool setup-provider-ca"
provider_name =
can be left blank
credentials = root:root
for device access requests
O3C-server service
By default, the service is called Axis O3C Server in Services or O3C-server in command prompt.
-
Start the O3C-server service
-
Enable One-click technology on the camera as described in the 4.1 part of the guide.
-
Disable firewalls or add O3C-server to the exceptions
-
Register the camera as described in guide 4.2 part.
-
where:user=adp_mirasys_100, pass=GQ41lSRbbEb4w3sorkN8 - Mirasys credentials (Provider name and password) from Axismac=B8A44F17AAFA, oak=8A22D6434817 - MAC address and OAK key from the camera
-
To find the MAC address using the following string in the browser: http://172.17.100.84/axis-cgi/admin/param.cgi?action=list&group=Network
-
server=172.17.102.56:80 - as "listen_client" in o3c-server.conf
-
Check that the camera was connected to the O3C-server: call in the browser th string: http://172.17.102.56:80/admin/status.cgi 172.17.102.56 - IP address of O3C-server
-
And check that there is a comment about the connected client as follows: "id=4.b8a44f17aafa srcaddr=172.17.100.84:34148 accepted=1 v=2 rx=0 tx=0 connected=2022-01-10T12:45:40.875571Z
Total number of clients: 1"
PS: the camera tries to connect to the server every 20 seconds
7. Check that we can get options from the camera: for that, it needed to configure the proxy settings for browser -
8. Open system Internet Options
9. Select Connections tab -> Select LAN settings button -> to enable "Use a proxy server for LAN (...)" and input the proxy IP address and port. (in the current case there is a local IP address and port 80)
10. After that we can get the camera capabilities in the browser:
-
http://b8a44f17aafa/axis-cgi/param.cgi?action=list&group=root.RemoteService where b8a44f17aafa - MAC address of the camera
Filter for wireshark for Axis P1375:
((ip.src == 172.17.100.84) && (ip.dst == 172.17.102.56)) || ((ip.src == 172.17.102.56) && (ip.dst == 172.17.100.84))
Axis One-Click kameran lisääminen
-
Avaa Järjestelmävälilehti
-
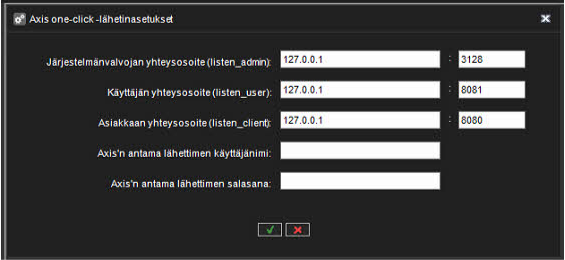
Mene Järjestelmäasetuksiin ja avaa Axis one-click asetukset
-
Täytä vaaditut tiedot ja klikkaa OK
-
Mene VMS Palvelimien välilehdelle
-
Klikkaa Laitteisto
-
Klikkaa Lisää Axis One-Click Camera kuvaketta
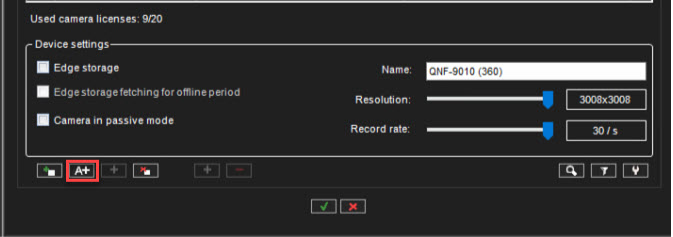
-
Täytä Axis One-Click kameran tiedot ja klikkaa OK
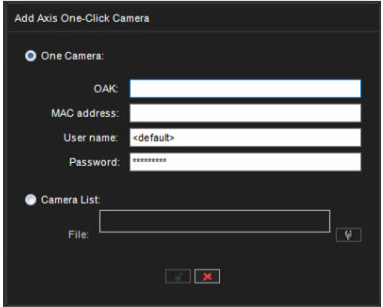
-
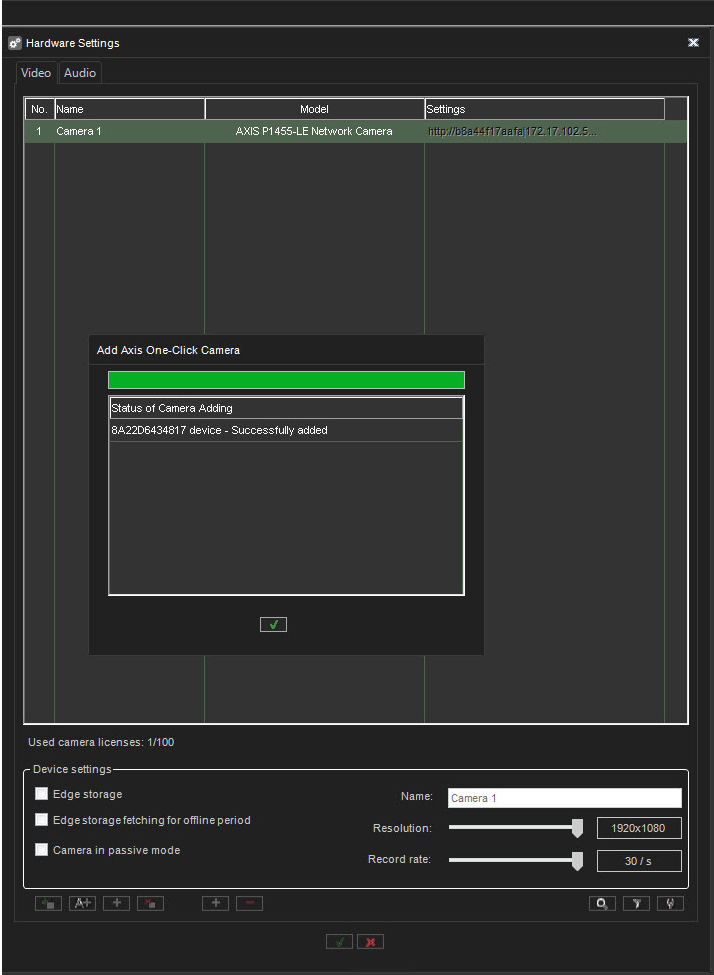
Klikkaamisen jälkeen järjestelmä etsii kamerat
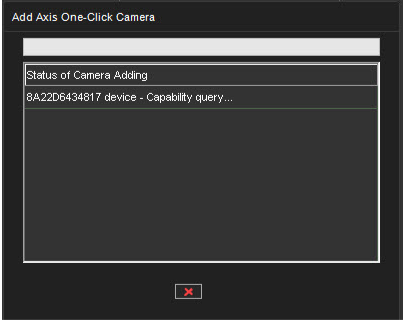
-
Kun tämä on valmistunut, niin kamerat ovat lisättynä laitteistoon
-
Klikkaa OK, tallentaaksesi asetukset