An essential feature of any video management system is creating authentic video export material for law enforcement authorities.
With Storyboard, it is possible to create a movie-like video export that makes it extremely easy for the recipient of the clip to view and understand instantly and accurately the chain of events. Storyboards can be viewed with the regular Spotter client application or the separate, standalone SpotterPlayer executable that is now exported as the default player for exported video.
Storyboard allows, for example, the following:
-
I am creating a movie-like viewing experience from surveillance video material.
-
Maintains complete material authenticity.
-
View material in the Storyboard in sequential playback mode or an all-cameras real-time mode.
-
Add clarifying comments and descriptions to activities.
-
Viewer for control of displaying of comments as subtitles.
-
Playback in continuous replay mode.
-
Save drafts and share the Storyboard with other system users.
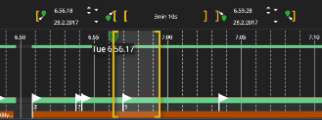
In addition to these, powerful features in the Spotter time slider make editing export clips very easy.
These are explained in the section.A single Storyboard can contain a maximum of 63 camera streams.
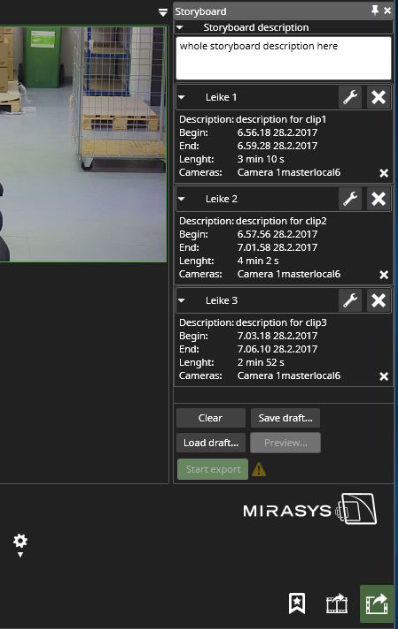
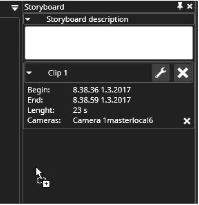
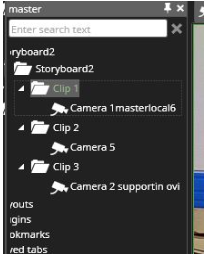
Adding Clips to Storyboard
A storyboard is constructed from individual clips.These clips can contain up to 8 cameras, but for the most "movie like" experience, it is preferable to use a single camera per clip.The recommended way to start storyboard creation is to find the camera and event that will be the first clip in the storyboard and adjust the first clip export start and end times usually with the export mode activity panel.
After this, add the clip to the storyboard with the "Add clip to storyboard" button.

This adds the clip as the first clip.
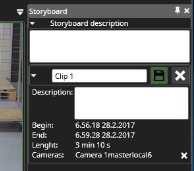
The clip is still in edit mode (white text boxes and the "Save" icon).The clip name or description can be edited. Any change in the clip start or end times or camera content is still reflected in the clip contents.If no editing is needed, press the "Save" button.

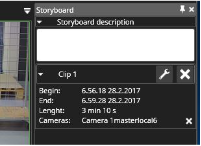
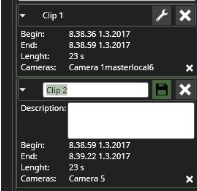
Now the clip is saved (texts change to non-white), and the following clip can be added to the storyboard.
The most convenient way to add the following clip is to find the camera, open it to the work area, and drag it below the first clip in the storyboard.
This will set the next clip start time to match the end time of the previous clip and copy the clip duration.The clip opens in edit mode, and the start and end times can be fine-tuned.
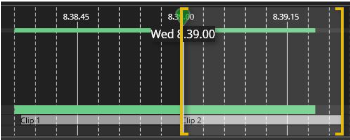
The clips are highlighted in the activity panel. Note that it is all right if the clips overlap.
This same process can be repeated to add more clips to the storyboard. When it becomes difficult to drop a new camera to the list, the recommended way is to drop the new camera to the scroll bar.This will add the camera as the last clip. If a camera is dropped on top of an existing clip in the storyboard list, it will be added to that clip as an extra camera.
There are other ways to add content to the storyboard:
-
With the camera toolbar export control.
-
By dragging and dropping from different search result screens and the device tree.
-
With a right-click option from the alarm list.
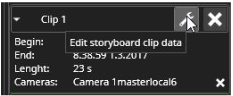
Editing Clips In Storyboard
Clips appear in the storyboard, always in time order, ordered by the clip's start time. A clip can be opened for editing later by pressing the "Edit" button.
When a clip is opened for editing:
-
Any other clips in edit mode are automatically saved.
-
The name and description are editable and changed to white to indicate this.
-
The export time slider is populated with the devices from the clip.
-
The start and end times are editable and can be adjusted.
-
Devices can be added to the export time slider, and saving the clip will add them to the storyboard.
If someone has created a bookmark for the clip time that is not already in the clip, editing the clip and saving the clip will add the bookmark to the storyboard.If the start time is adjusted so that it is now earlier than before and before another clip, the clips are rearranged in the storyboard list automatically.The start and end times of the clips can overlap. The start time of a later clip can be earlier than the end time of the previous clip.The user has several options for playback, but in the default setting, the clips are played sequentially, the first one to the end before the next one starts, even if the clip times overlap.The overlapping times are indicated in the time slider by a slight difference in the colour of the clips where they overlap.

Please note that if the storyboard is long, the clips can be minimized with the click of the clip title.
Descriptions And Comments
The storyboard has several types of descriptions:
-
Whole storyboard description
-
Individual clip descriptions
-
Bookmarks
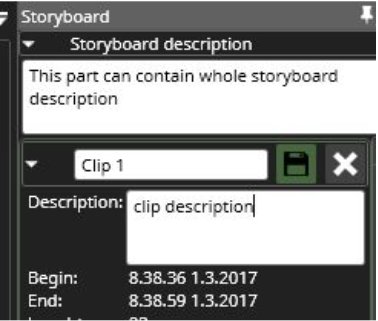
The descriptions are shown to viewers of the storyboard as subtitles.The timing of showing the descriptions is based on the start time of the clip or bookmark.Description texts are also exported in HTML text format to the target folder for further use for the target audience.
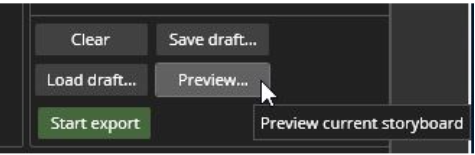
Preview
During the construction of a storyboard, it is possible to preview the storyboard by pressing the "Preview" button.This opens a new Spotter window where the draft storyboard can be previewed.After previewing, it is recommended to close the window and make any desired adjustments to the storyboard in the original Spotter window.
Preview opens in a unique Spotter window, first to full screen, but the window can also be resized.
Drafts And Sharing
It is possible to save storyboard drafts by pressing the "Save draft…" button.
This will open a dialogue where the user can enter a name for the draft storyboard. If there are many users interested in draft storyboards, it is recommended to save the storyboard to a shared location, such as a network drive. Then the draft storyboards can be opened by anyone who has access to the same profile used to generate the storyboard draft. The location can be defined in settings. The "Load draft" button can be used to load a draft storyboard.
Please note that closing the Spotter window or exiting Spotter will clear any unfinished and unsaved storyboard contents.
Settings
Settings for the storyboard are described in Storyboard Settings.
Exporting Storyboards
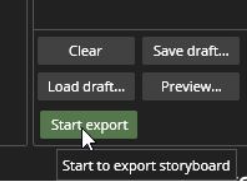
When the storyboard is ready to be exported, the user can press the "Start Export" button. This will open a dialogue where the location and name can be adjusted.If no information is given, a default location and default name will be used. Please note that large storyboards can take some time to export. It is also possible to export the individual video clips from the time slider button.The SpotterPlayer application will also be exported to the target folder if it is not already there. In addition to the media, the HTML text attachment with a summary and details of the storyboard is also exported to the target folder.
Viewing Storyboards
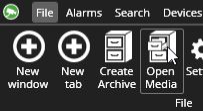
A storyboard can be viewed with Spotter or with the SpotterPlayer.Media can be opened by pressing the F4 key or by "Open media" from the File menu or by double-clicking the storyboard file in the file system.
Then the storyboard can be opened from the file selection dialogue
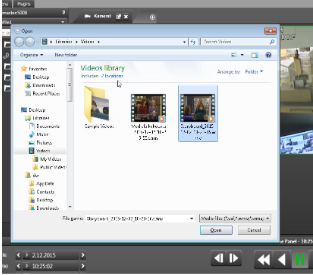
Media opens in "Media view" mode with a green window title.
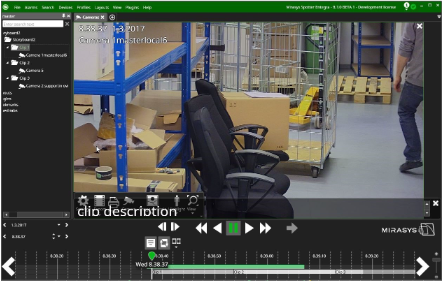
The clip will default open with the comment subtitles on and the player in "Repeat" mode. The individual clips are seen in the device tree area.
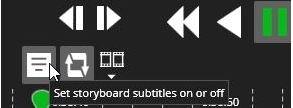
The repeat and subtitle settings and the playtime settings can be changed from the buttons next to the playback controls.
Other Viewing Modes
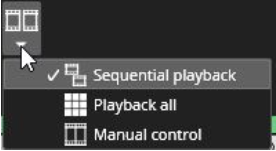
The sequential mode is the default playback mode. It plays the clips in time order, ordered by the start time of the clip. It plays each clip entirely before moving to the next so that the time can jump backwards in this mode.The user can switch the playback mode at any time. If he switches to "Playback all" mode, all cameras in the storyboard are opened.Note that when the user starts to play in this mode, the time does not jump backwards when clips overlap, but the storyboard is played in real-time. In the manual mode, no camera is opened or closed automatically, and the user can choose which camera to open from the device tree.